First Aid Kit For Hikers: What You Actually Need
A first aid kit is one of those things you barely think about until you really need it. And on a trail, “need it” usually means something small but trip-changing: a hot spot turning into a blister, a scraped knee that won’t stop bleeding, a splinter that makes trekking poles miserable, or a minor cut that becomes a dirty, infected mess because nobody could clean it properly.
This guide covers the essentials of a hiker’s first-aid kit. It is not about diagnosing injuries or walking you through medical treatment. Think of it as a practical packing list, with just enough context to explain why each item earns its space.
Also, a quick reality check: first aid is not a substitute for medical care. If something is serious, prioritize evacuation, calling emergency services, and getting professional help. It’s also important to remember that in cases of hiking accidents caused by someone else’s negligence, a personal injury lawyer can help explain your next steps and legal options.
Why A “Real” First Aid Kit Matters On The Trail
Most hikers start with a tiny pre-made kit, toss it in the pack, and assume they’re covered. The problem is that many pre-made kits are mostly:
- A pile of generic Band-Aids
- A couple of tiny alcohol wipes
- Low-quality tape that fails the moment sweat shows up
- “Extras” you won’t use, while missing what you actually reach for
On the trail, the kit that helps is the one that lets you do the basics well:
- Clean hands
- Clean wounds
- Cover and protect
- Prevent blisters
- Handle minor issues fast so the day doesn’t unravel
A good kit also buys you confidence. You move quicker, you improvise better, and you are less likely to turn around early because of something that could have been handled in two minutes.
Start Here: Choose The Right Kit Size For Your Hike
Your kit should match the hike, not your anxiety.
Day Hike Vs. Weekend Vs. Multi-Day: What Changes?
A longer trip or more remote terrain changes what you carry because you have fewer easy exit options.
- Day hike (near town, popular trails): Pack a compact baseline of essentials, focus on blister care, and bring minimal medications.
- Weekend hike (1–2 nights): Include duplicates of high-use items, extra dressings, and more cleaning supplies.
- Multi-day or remote routes: Carry additional irrigation supplies and gauze, more medications, and thorough documentation, and emphasize staying dry and organized.
- Group hikes: Bring extra copies of items everyone uses, such as gloves, wipes, tape, and blister-care supplies.
A Simple Sizing Rule
Start with an essentials baseline kit for every hike. Then add a few targeted “modules” based on:
- Distance from help
- Weather (heat, cold, wet)
- Group size
- Trip length
Where To Store It (So You Actually Use It)
- A first aid kit buried under layers is basically a “someday” kit.
- Keep it near the top of your pack, or in an outer pocket if it’s waterproof.
- For quick-access items (like blister tape), consider a tiny micro-pouch in your hip belt pocket.
- Waterproofing matters. Use a small dry bag, waterproof zip pouch, or double bag with zip-top bags.
What To Avoid
- Bulky hard cases that waste space
- Oversized bottles (you only need enough for the trip)
- Anything you don’t know how to use under stress
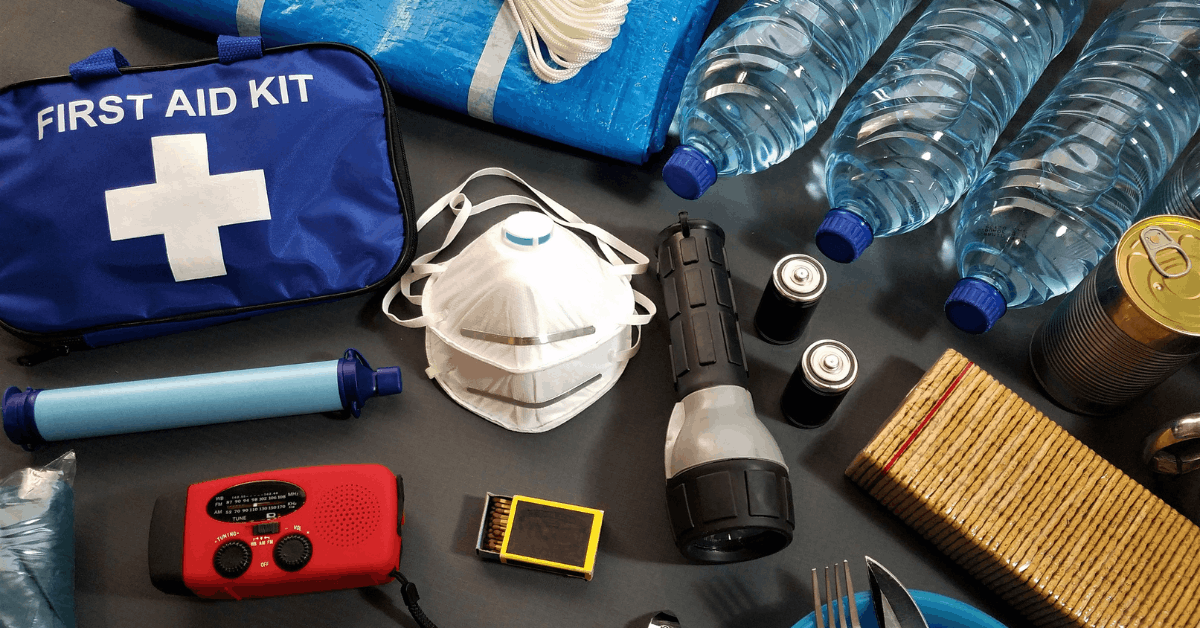
Must-Have First Aid Items (The Things You’ll Use Most)
Here’s the non-negotiable checklist. The theme is compact, trail-usable, and multi-purpose.
Two packing tips that make a big difference:
- Pack duplicates of high-use items (gloves, wipes, tape).
- Use labeled mini-bags inside your kit (Cleaning, Dressings, Blister, Meds, Tools). It speeds everything up when your hands are cold or you’re helping someone else.
1) Hand protection & hygiene
If your hands are clean, most small problems stay small.
Pack:
- Nitrile gloves (2–4 pairs): Nitrile is durable and avoids latex allergy issues. Bring a size that actually fits, because torn gloves are frustrating when you need them.
- Hand sanitizer (travel size): Choose a leak-proof bottle. Put it in a mini bag so it cannot soak your bandages if it leaks.
- Antiseptic wipes (single-use): Great for quick hand cleaning, small tools, or the skin around a minor cut. (Practical count: 6–10 for a day hike, 10–20 for longer trips or groups.)
Optional for longer trips: Soap sheets or a tiny biodegradable soap. Useful when you have water and want a real wash.
2) Wound cleaning essentials
Most “first aid” on trail is really “clean it well, then cover it.”
Pack:
- Irrigation option: Small saline pods, or clean water with a small syringe or irrigation cap. Rinsing is essential because it clears grit that may cause inflammation and infection.
- Sterile gauze pads (various sizes): For cleaning, absorbing, and covering. (Practical count: a small stack (6–10 pads) for day hikes, more for longer trips.)
- Non-adherent pads: These help prevent dressings from sticking to a wound, making removal later easier and less painful.
Choosing between alcohol and antiseptic wipes
- Alcohol wipes are useful for cleaning tools (like tweezers) or for cleaning the intact skin around an area.
- Antiseptic wipes are generally better for gentle cleaning needs.
Avoid overdoing harsh cleaning directly on sensitive skin, especially if it irritates. The real goal is to remove dirt and keep things covered.
3) Dressings & bandages
This is the “keep it protected so we can keep moving” category.
Pack:
- Bandages with adhesive (various types): Choose fabrics that are strong and will stay on even when you sweat.
- Butterfly closures or steri-strips: Small and useful for small cuts that need a little extra support to close.
- Roll gauze or conforming bandage: Great for wrapping and holding pads in place. Pick a width that fits your wrists and ankles.
- ACE-type elastic wrap bandage: Good for support and keeping dressings in place. Versions that stick to themselves are easier on the trail.
- Medical tape that sticks to sweat: Cloth or zinc oxide tape usually sticks better. (Space tip: Instead of bringing the whole roll, wrap tape around a small card or flat piece of plastic.)
4) Blister prevention & foot care
For many hikers, blister care is the number one reason the kit gets opened.
Pack:
Moleskin vs hydrocolloid blister dressings
- Moleskin is great for padding and friction reduction, especially for prevention.
- Hydrocolloid dressings are excellent when a blister is already forming or has formed, because they cushion and protect. Many hikers carry both, but if you choose one, pick the one that matches your typical problem.
Additional blister prevention items
- Leukotape or athletic tape: Trail favorite for “hot spot” taping before things get bad. It sticks well and can save a trip.
- Small scissors (or a tape technique): Pre-cut strips at home and stick them to wax paper or backing so you can apply them quickly.
Optional: Toe sleeves or blister cushions if you know your feet tend to suffer.
5) Tools that make your first aid kit functional
A kit is only as useful as your ability to apply it quickly.
Pack:
- Fine-tip tweezers: For splinters and ticks. Store them in a small tube or guard so the tips do not get bent.
- Small scissors or mini EMT shears: For tape, gauze, blister dressings, or cutting clothing if needed.
- Safety pins: For securing wraps and for basic gear fixes.
Optional for groups: A compact CPR face shield. Lightweight, easy to pack, and worth considering when you hike with others.
Optional for longer trips: A tiny digital thermometer, mainly for better decision-making when you are far from help.
6) Medications
Stick to items you can safely use and understand. Be cautious about giving medication to others, since allergies or medical conditions may be unknown.
Core OTC Picks (small quantities):
- Pain reliever: Ibuprofen or acetaminophen. Choose the one you can safely take.
- Antihistamine: For allergies or mild reactions.
- Anti-diarrheal: Bring a small supply because stomach issues can quickly derail a hike.
- Oral rehydration salts or electrolyte tabs: Useful for hydration and recovery.
Topicals (small amounts):
- Hydrocortisone: Relieves itch and irritation.
- Antibiotic ointment: Small tube for cuts or scrapes.
- Lip balm with SPF: A simple item for sun protection and frequent use.
Storage tips:
- Keep meds in blister packs when possible.
- Label mini bags with name, dose, and expiry.
- Protect from heat and moisture. A waterproof inner pouch helps.
7) Protection from the environment
Trail “first aid” includes preventing sun, bug, cold, and wet problems that create emergencies.
Pack for the following:
- Sun: sunscreen stick plus SPF lip balm. Reapply more than you think, especially on exposed ridgelines.
- Bugs: repellent wipes or a small bottle, plus an after-bite relief stick if you like.
- Cold and wet: an emergency blanket (mylar) is a compact must-have. It is not just for warmth; it helps with basic shelter and heat retention when conditions shift.
- Heat: electrolyte tabs, plus a strong hydration plan. (This is about preparedness, not treating serious heat illness.)
8) Documentation & emergency information
This is the category you hope you never need, and you will be glad you packed it if you do.
Pack:
- Mini info card: List emergency contacts, allergies, medications, and key medical conditions. Blood type is optional.
- Local emergency numbers and park ranger contact: Note that cell service may be limited.
- Small notepad and pencil: Record the time, symptoms, location, and what was done. This information helps responders and keeps you calm and organized.
If hiking with kids or groups, provide basic consent and medical information as appropriate. You can also use your notepad to record your injuries. If someone is responsible for the hiking accident, your notes can help show how it happened. You can then use this information to support your claim.
Having A First Aid Kit Matters
Build your kit today, then refine it after each hike based on what you actually used. That is how you end up with a kit that feels boring in the best way, because it quietly prevents small problems from becoming big ones.
If you want, turn this article into a simple routine: print the checklist, pack it with your hiking gear, and pair it with your usual packing list and route guides so you never start a hike unprepared.