Delicious Pear Tart: A Step-by-Step Guide to Perfection
Creating a delicious pear tart is an enjoyable culinary journey that transforms simple ingredients into a gourmet dessert. Start by preparing the pears, enhancing their natural sweetness with brown sugar and lemon zest, and mixing them with chopped stem ginger for a warm, aromatic flavor. Assemble the tart by carefully crimping the pastry around the pears, then bake until golden and glossy. Finally, allow it to cool, slice with precision, and serve with whipped cream or vanilla ice cream for an irresistible treat.
Preparing the Pears
How does one transform humble pears into a delightful tart centerpiece? Begin with peeling, then top and tail the pears into quarters.
They soften quickly in the oven, so choose whole, half, or quartered forms based on texture preference. Add a zing with stem ginger and a splash of syrup; the combination promises a warm, spicy aroma.
A sprinkle of brown sugar and a zest of lemon enhance the natural sweetness and bring a burst of freshness. These simple yet flavorful steps make the pears ready to shine.
Who knew preparing pears could feel like such a gourmet adventure?
Mixing the Ingredients
Let’s plunge into the delightful process of mixing the ingredients for our pear tart. First, the pears are gently combined with fragrant stem ginger and its syrup. This mixture is then lovingly enveloped with brown sugar and a zest of fresh lemon. Each component sings in harmony, enhancing the tart’s flavor profile.
| Ingredient | Amount | Purpose |
|---|---|---|
| Pears | 4, quartered | Base fruit |
| Stem Ginger | 2 tbsp, chopped | Adds warmth |
| Ginger Syrup | 1 tbsp | Sweetens and moistens |
| Brown Sugar | 1/2 cup | Sweetness |
| Lemon Zest | 1 tsp | Brightens and balances taste |
Stir patiently, savoring the aromatic journey ahead.
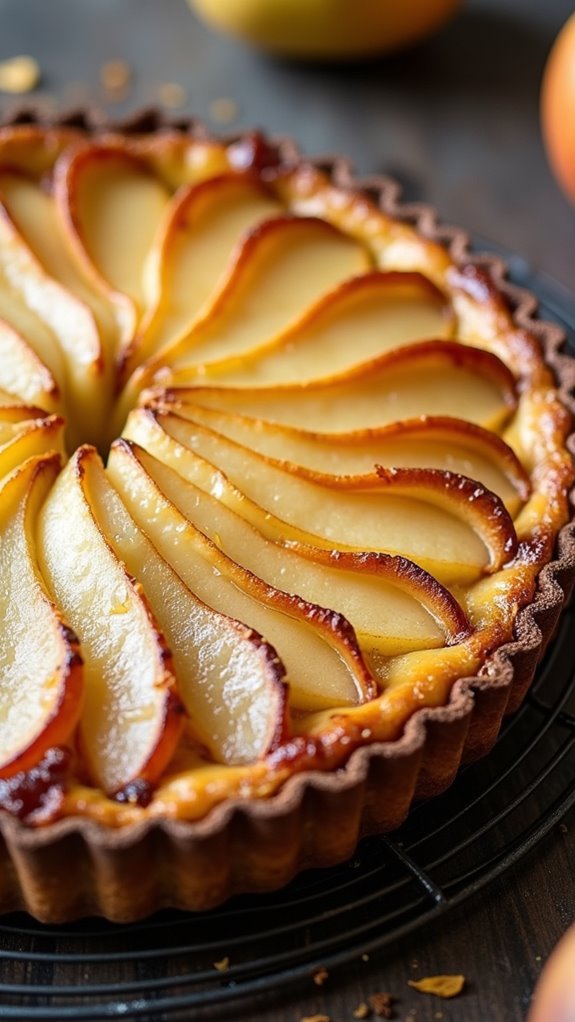
Assembling the Tart
Assembling the tart is where the magic truly begins!
With the ingredients prepared and mixed, the tart starts taking shape. Here’s a quick guide:
- Egg Wash the Pastry: Brush the outer edges with egg wash for a glossy finish and to secure the pastry.
- Crimp the Edges: Pinch the pastry’s edges, creating a cozy nook for the pears. It’s like tucking them in for a sweet slumber!
- Build the Pastry: Gently shape it around the pears, ensuring a snug fit.
- Add Ginger Toppers: Sprinkle fresh and stem ginger for a zingy finish, enhancing flavor and aroma beautifully.
Baking the Tart
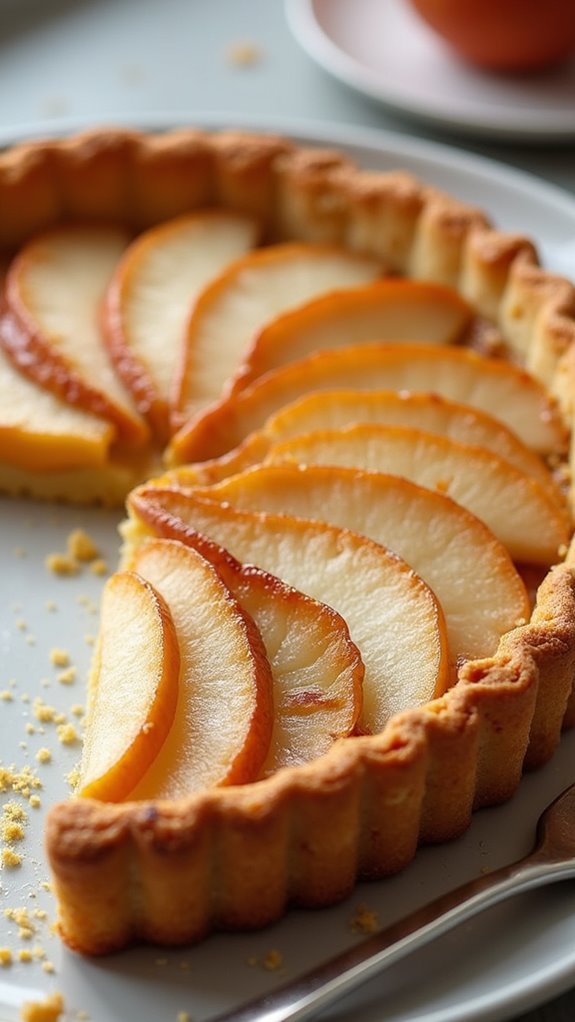
Baking the pear tart is like watching a masterpiece come to life in your oven. The inviting aroma of ginger and pears melds with the sweet pastry, creating an invisible embrace around your kitchen.
At 180 degrees Celsius, the tart slowly transforms, its pastry turning golden and glossy from the glaze. It’s essential to monitor its appearance—shine and fragrance signal readiness. If the crust browns too quickly, a loose foil tent offers a simple solution.
As you wait, imagine the tart’s crisp edges and tender center, a symphony of textures. Baking becomes an art, the oven your creative canvas.
Serving the Tart
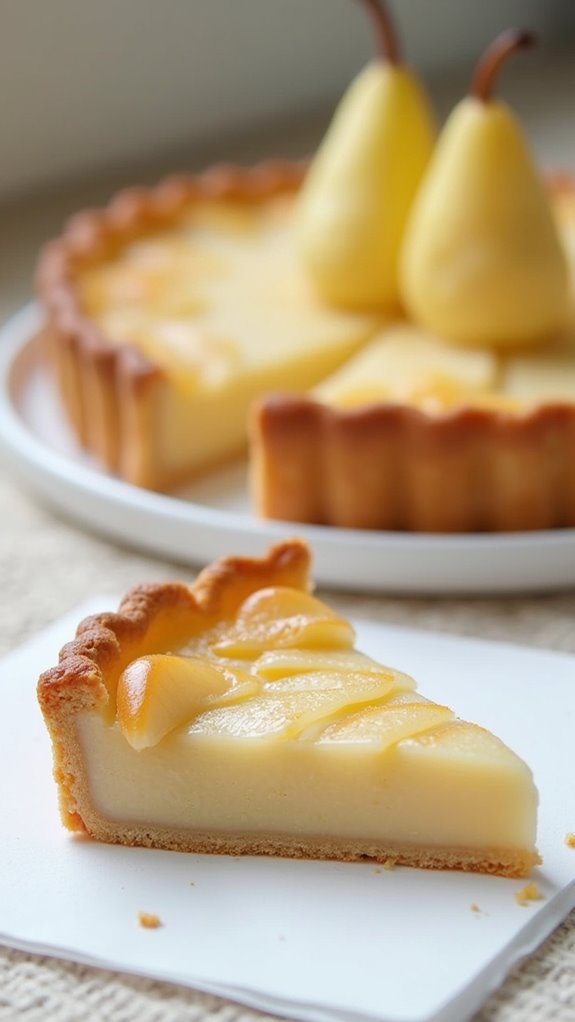
There’s nothing quite like the moment when a freshly baked pear tart makes its grand entrance to the table.
The aroma of warm pears and ginger fills the air, inviting everyone to gather ’round.
To serve this delightful creation, follow these steps:
- Cooling: Allow the tart to rest for 10 minutes. It’s tempting, but patience will reward you with perfect slices.
- Slicing: Use a sharp knife for clean cuts, ensuring each slice holds its shape.
- Plating: Serve on a simple plate to let the tart’s beauty shine.
- Garnishing: A dollop of whipped cream or a scoop of vanilla ice cream elevates the experience.