Car Camping Organization: Camp Gear Storage Tips and Hacks
Let’s talk car camping organization — the difference between a peaceful long weekend and a trunk explosion. I’ve lived out of my car by choice (hi, rent savings 👋), and the #1 lesson I learned is this: when every item has a home, camping becomes easy, fast, and actually relaxing.
Why Organization Matters (Beyond “Looking Tidy”)
- Speed: You pack and unpack in minutes because everything has a permanent spot.
- Sanity: No more rummaging for headlamps in the dark or the “mystery fuel canister.”
- Gear longevity: Pots don’t dent sleeping pads; stoves don’t crush food; liquids don’t leak on clothing.
- Safety: Critical items (first aid, water, lights) are always accessible and visible.
The Four Core Categories (Pack Like This Every Time)
I sort everything into four buckets. It keeps decisions simple and makes the car layout obvious.
1) Kitchen Gear
Everything required to cook, eat, and clean: a camping stove, fuel, water container, pots/pans, utensils, cutting board, wash kit, matches/lighter, dish towel.
2) Food
Dry goods, snacks, backup meals, oil, coffee/tea, spices, and a cooler for cold items. Food lives separate from kitchen hardware to prevent crumbs, smells, and critters.
3) Shelter + Sleep
Tent, footprint, stakes/guylines, mallet, sleeping pad, bag/blanket, pillow, and lighting (lantern + headlamps).
4) Personal
Clothes, jackets, toiletries, towel, meds, sunscreen/bug spray, book/games. I keep all personal items in one duffel so I always know where my jacket and toothbrush live.
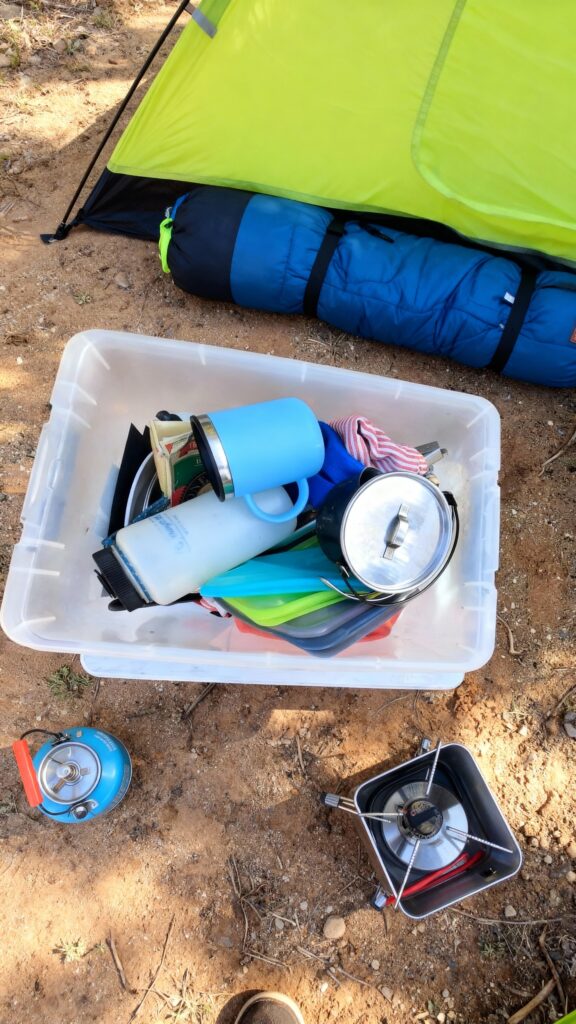
The Bin System (Your Stress-Free Backbone)
Chaos comes from loose items. Bins fix that. I use two latching bins year-round, packed and ready in a closet. On trip day, I add perishables, grab the bins, and go.
Bin #1: Camp Kitchen (Hardware Only)
What’s inside mine:
- Cast iron skillet + lightweight pot with lid
- 2 plates, 2 bowls, 2 mugs (scale for your crew)
- Utensil set, spatula, tongs, knife with sheath
- Cutting board + heatproof glove
- Collapsible wash basin + scrubber + eco soap
- Stove + fuel, stormproof lighter + matches
- Foil, resealable bags, paper towels, trash bags
- Micro repair kit (duct/gear tape, zip ties, spare bolts for stove)
Rule: No food in this bin. Hardware stays clean, dry, and critter-neutral.
Bin #2: Food + Pantry (Dry Goods Only)
Top layer = daily items; bottom layer = long-life backups. Add a small caddy for spices/condiments.
- Staples: pasta, rice, oats, tortillas, shelf-stable milk
- Backups: mac & cheese, ramen, instant mashed potatoes, Indian packets + rice, pancake mix
- Snacks: nuts, bars, jerky, dried fruit
- Breakfast corner: coffee/tea/cocoa, sugar, creamer
- Spices/condiments (in a mini box): salt, pepper, blends, syrup, hot sauce, soy sauce, oil
- Storage: latching bin for critter resistance
Why latching? Mice and chipmunks can squeeze into shocking gaps (even in parked cars). Latching lids deter them. Not bear-proof — use proper bear storage where required.
Spice & Condiment Caddy (Tiny Box, Big Upgrade)
Put small bottles in a narrow, upright caddy so they don’t tip in transit. Label lids so you can see everything at a glance.
- Mini bottles: spice containers
- Leak control: decant syrups/oils into travel squeeze bottles
- Keep a tiny funnel + marker in the caddy for quick refills and relabels
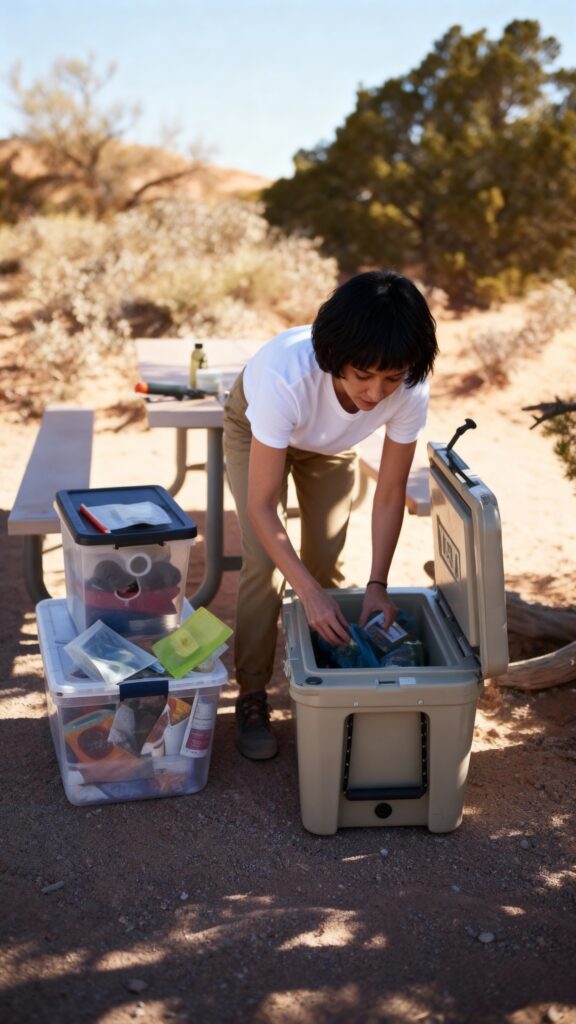
Cooler Management (Cold Food That Stays Cold)
- Block ice beats cubes. Freeze water bottles or use large ice packs; cubes are for the top layer only.
- Layering: bottom = blocks, middle = dairy/meats, top = produce and “grab” items.
- Two-cooler strategy: a food cooler and a drinks cooler. Opening the drink cooler 20x/day won’t warm your chicken.
- Drain discipline: Don’t constantly drain meltwater; it can keep food colder. Drain only if water reaches food bags.
- Shade always. Throw a reflective blanket or towel over the cooler at camp and in the car.
Car Layout: Pack Like a Tetris Master
- Heavy bins low, close to the rear seats for better weight distribution.
- Build a base: Bins first, then soft gear (duffel, sleeping bags) to fill voids.
- Quick-access zone: headlamps, jackets, snacks, paper towels, and the first-aid kit near the hatch.
- Restraint: Use tie-down straps or a cargo net to stop sliding.
- Sedan setup: Use a trunk organizer + two medium bins; long items (tent poles) along the seat backs.
- SUV/hatch: Two large bins side-by-side; cooler at the door; duffel stacks on top; chairs slide along one side.
- Roof cargo (optional): A roof box is great for bulky, light items (chairs, pads, pillows). Keep heavy stuff inside the car.
Set-Up Workflow at Camp (10-Minute Routine)
- Park + Open hatch with quick-access items first: headlamps, jackets, lantern.
- Place bins to mark your “kitchen zone,” then pitch the tent on flat ground.
- Move cooler to shade and set up the stove → prep → wash triangle.
- Put a lantern on the table before sunset; headlamps get handed out now.
- Create a clean entry: small mat + shoe line outside the tent.
Micro-Hacks That Change Everything
- Label everything: Use painter’s tape + marker on bin lids (Kitchen, Food, Sleep, Personal).
- Packing cubes: Separate clothes by category inside your duffel (base layers / socks / outerwear).
- Dedicated “grab kit”: mini pouch with lip balm, sunscreen stick, sanitizer, tissues, bug wipes.
- Trash plan: car-friendly collapsible bin + spare liners.
- Odor control: line the food bin with odor-resistant bags for pungent items.
- Kiddos: give each child a color-coded headlamp and a mini stuff sack for “personal treasures.”
- Pets: a dedicated pet tote (food, collapsible bowl, towel, tie-out, brush, poo bags).
Power & Lighting (No Cable Nests Allowed)
- One box for tech: a zip electronics organizer for cables, wall adapters, and a 20,000mAh power bank.
- Task vs. ambient: headlamps for tasks; lantern for table; string lights for mood.
- Battery policy: recharge everything in the car while driving between stops.
Food Safety & Critter Safety (Non-Negotiable)
- Keep raw meat sealed in leakproof bags; store at the bottom of the cooler.
- Prep at home: pre-chop veggies; pre-marinate meats (less mess at camp).
- Never store food in the tent. Use bear boxes where provided or a bear canister as required.
- Grey water: strain solids and dispose 200 ft from water sources; pack out food bits.
Seasonal Swaps (Edit the Bins, Not the System)
- Summer add-ons: shade cloth, extra water jug, electrolyte packets, bug head net.
- Shoulder season: higher R-value pad, bag liner, extra lantern, more fuel.
- Winter car camps: insulated mug set, hand warmers, heavier cookware glove.
Post-Trip Reset (10 Minutes, Big Payout)
- Unload bins to the kitchen/bathroom.
- Wash gear; air-dry lids, basins, and textiles.
- Pull perishables from the food bin; restock backups you used.
- Refill the spice caddy; relabel if needed.
- Return both bins to the closet, ready to roll.
Bonus: Organization Helpers I Actually Love
- Latching storage bins (critter-resistant, stackable)
- Trunk organizer (sedans especially)
- Tie-down straps + cargo net (no shifting)
- Electronics organizer (no cable spaghetti)
- Collapsible sink + camp towels
- Odor-resistant bags (pungent foods)
Quick-Grab Checklist (Print or Save)
- Kitchen bin: stove + fuel, pot/pan, utensils, board, wash kit, lighter/matches, towels, foil, bags, trash liners
- Food bin: dry goods, backups, snacks, coffee/tea, oil, spice/condiment caddy
- Cold: cooler (blocks + cubes), dairy/meats bottom, produce top
- Shelter/sleep: tent, footprint, stakes/guylines, mallet, pad, bag, pillow, lantern, headlamps
- Personal: clothing layers, warm jacket, toiletries, meds, towel, sunscreen, bug spray
- Safety/other: first aid kit, water container, map/app offline, repair tape, tie-downs, trash plan
FAQs
How big should my bins be?
Two medium latching bins are easier to lift and pack than one giant one. Aim for sizes that stack flush in your trunk so you don’t waste vertical space.
Where do chairs, tables, and hammocks go?
Slide chairs along one side; stash a folding camp table flat against the seats; a hammock rides on top of soft gear.
What if I’m always forgetting small things?
Create a permanent zip pouch labeled “GRAB KIT” and keep it in the trunk organizer. Restock after each trip.