Molten Chocolate Lava Cakes
Individual chocolate cakes with warm, gooey centers that flow like lava when you cut into them.
This indulgent dessert is a Valentine’s Day classic, perfect for ending a romantic dinner or impressing your Galentine’s crew.
The timing is everything with this recipe: a minute too long in the oven and you have brownies; pull them at just the right moment and you have restaurant-quality drama on a plate.
WANT TO SAVE THIS FOR LATER?
We'll email it to you!
We won't send you spam. Unsubscribe at any time.
Why You’ll Love It
- Just 6 main ingredients you likely already have
- Total time from start to plate: about 30 minutes
- Impressive presentation that looks far harder than it is
- Can be prepped ahead and frozen for stress-free entertaining
- The freezer method actually makes timing more forgiving, not harder
Ingredients
Makes 4 individual cakes
- 4 ounces (113g) high-quality bittersweet or semisweet chocolate (60-70% cacao), roughly chopped
- 1/2 cup (113g / 1 stick) unsalted butter, cut into pieces
- 1 cup (120g) powdered sugar, sifted
- 2 large eggs, at room temperature
- 2 large egg yolks, at room temperature
- 6 tablespoons (48g) all-purpose flour
For preparing the ramekins:
- 1 tablespoon softened butter
- 1 tablespoon unsweetened cocoa powder
Optional toppings:
- Powdered sugar for dusting
- Fresh raspberries or strawberries
- Vanilla ice cream or whipped cream
- Flaky sea salt
Steps
1. Preheat the oven first.
Set your oven to 425°F and position a rack in the center.
The oven must be fully preheated before the cakes go in; starting in a cold or partially heated oven will throw off the timing completely.
2. Prepare the ramekins thoroughly.
Using a pastry brush or your fingers, coat the inside of four 6-ounce ceramic ramekins with a thick, even layer of softened butter.
Make sure to get into every crevice and up the sides completely; any missed spots will cause sticking.
Add about a teaspoon of cocoa powder to one ramekin, then rotate and tap it so the cocoa coats all the buttered surfaces.
Tap out the excess into the next ramekin and repeat.
Cocoa powder is used instead of flour because flour can leave a visible white coating on the finished cakes, while cocoa blends in seamlessly.
Place the prepared ramekins on a rimmed baking sheet for easy transport in and out of the oven.
3. Melt the chocolate and butter properly.
Place the chopped chocolate and butter pieces in a medium microwave-safe bowl.
Microwave in 30-second intervals at 50% power, stirring thoroughly after each interval.
This usually takes 3-4 intervals (90 seconds to 2 minutes total).
Stop microwaving when small pieces of chocolate remain; the residual heat will melt them as you stir.
Overheating chocolate causes it to seize (become grainy and thick) and cannot be fixed.
Alternatively, use the double boiler method: set a heatproof bowl over a pot of barely simmering water (the bowl should not touch the water) and stir until melted and smooth.
The mixture should be completely smooth with no visible butter pools or chocolate chunks.
4. Let the chocolate mixture cool slightly.
Let the chocolate-butter mixture sit for 3-5 minutes.
It should feel warm but not hot when you touch the outside of the bowl.
If the mixture is too hot when you add the eggs, you will scramble them and ruin the batter.
To test: dip a clean finger in; it should feel like warm bathwater, not hot.
5. Add the powdered sugar.
Add the sifted powdered sugar to the chocolate mixture.
Whisk until completely smooth and the sugar is fully dissolved.
The mixture will become slightly thicker and very glossy.
6. Add the eggs one at a time.
Add one whole egg and whisk vigorously until completely incorporated.
Repeat with the second whole egg.
Then add the egg yolks one at a time, whisking well after each.
The batter should be smooth, glossy, and ribbony when you lift the whisk.
Adding eggs one at a time ensures each is fully emulsified into the batter; dumping them all in at once can result in a broken, curdled-looking mixture.
7. Fold in the flour.
Sift the flour directly over the batter (sifting prevents lumps).
Using a silicone spatula, fold the flour in gently using a cutting and folding motion.
Stop as soon as no dry flour is visible.
Overmixing develops gluten and makes the cakes tough rather than tender.
The batter should be thick, smooth, and pourable like thick cake batter.
8. Divide the batter evenly.
Pour or spoon the batter into the prepared ramekins, dividing it equally.
Each ramekin should be about three-quarters full, leaving about half an inch of space at the top for the cakes to rise.
If you want precision, use a kitchen scale: each ramekin should get about 85-90 grams of batter.
9. Bake and watch carefully.
Place the baking sheet with ramekins in the center of the preheated oven.
Bake for exactly 12 minutes, then check.
The cakes are ready when the edges are set and slightly pulled away from the ramekin sides, the tops look matte and slightly domed with small cracks, and the center jiggles like set Jell-O (not like liquid) when you gently shake the baking sheet.
If the center still looks wet or jiggles like liquid, bake 1 more minute and check again.
Total baking time is typically 12-14 minutes depending on your oven, the temperature of your batter, and your ramekin material (glass takes longer than ceramic).
10. Rest briefly, then unmold immediately.
Remove from the oven and let the cakes rest in the ramekins for exactly 1 minute.
This brief rest allows the structure to set just enough to hold together during unmolding.
Waiting longer allows the residual heat to continue cooking the center, eliminating the molten effect.
Run a thin knife or small offset spatula around the edge of each cake to release the sides.
Place a serving plate upside-down on top of a ramekin, then quickly flip both together.
Give the ramekin a gentle tap on top if needed, then lift it straight up.
If a cake sticks, you likely missed a spot when buttering.
11. Serve immediately.
These must be served within 1-2 minutes of unmolding.
Add any toppings quickly and get them to the table.
Instruct diners to cut into the center immediately to release the molten flow.
Helpful Tips and Substitutions
Always test one first. Oven temperatures vary significantly. Before serving these to guests, make the full batch but bake just one cake first to nail down the exact timing for your oven. The other ramekins can wait at room temperature for 15-20 minutes or in the refrigerator while you test.
The freezer method (highly recommended for entertaining): Prepare the batter and fill the ramekins. Cover each tightly with plastic wrap and freeze for up to 2 months. To bake from frozen: place frozen ramekins (unwrapped) directly in a preheated 425°F oven and bake for 14-16 minutes. The frozen center actually gives you a wider window of success because the outside sets while the inside slowly thaws and heats.
Chocolate selection matters: Use a high-quality chocolate bar (Ghirardelli, Lindt, Guittard, or Valrhona), chopped into pieces. Chocolate chips contain stabilizers that prevent them from melting smoothly and will affect both texture and flavor. Bittersweet (60-70% cacao) gives the best balance of chocolate intensity and sweetness.
Room temperature eggs are essential. Cold eggs can cause the warm chocolate mixture to seize or thicken unevenly. Set eggs out 30 minutes before starting, or place them in a bowl of warm water for 5 minutes.
Different ramekin sizes: For 4-ounce ramekins, reduce baking time by 2 minutes. For 8-ounce ramekins, increase by 2-3 minutes. The jiggle test remains your most reliable indicator.
Make it gluten-free: Replace the all-purpose flour with an equal amount of almond flour or a gluten-free flour blend. The texture will be slightly different but still delicious.
Underbaked is better than overbaked. An underbaked lava cake still has molten center appeal. An overbaked one is just a small, dense brownie. When in doubt, pull them out.
Reheating leftover cakes: If you have an overbaked cake or leftover cake, microwave for 15-20 seconds to warm through. It won’t be molten, but it will be warm and fudgy.
Serving Ideas
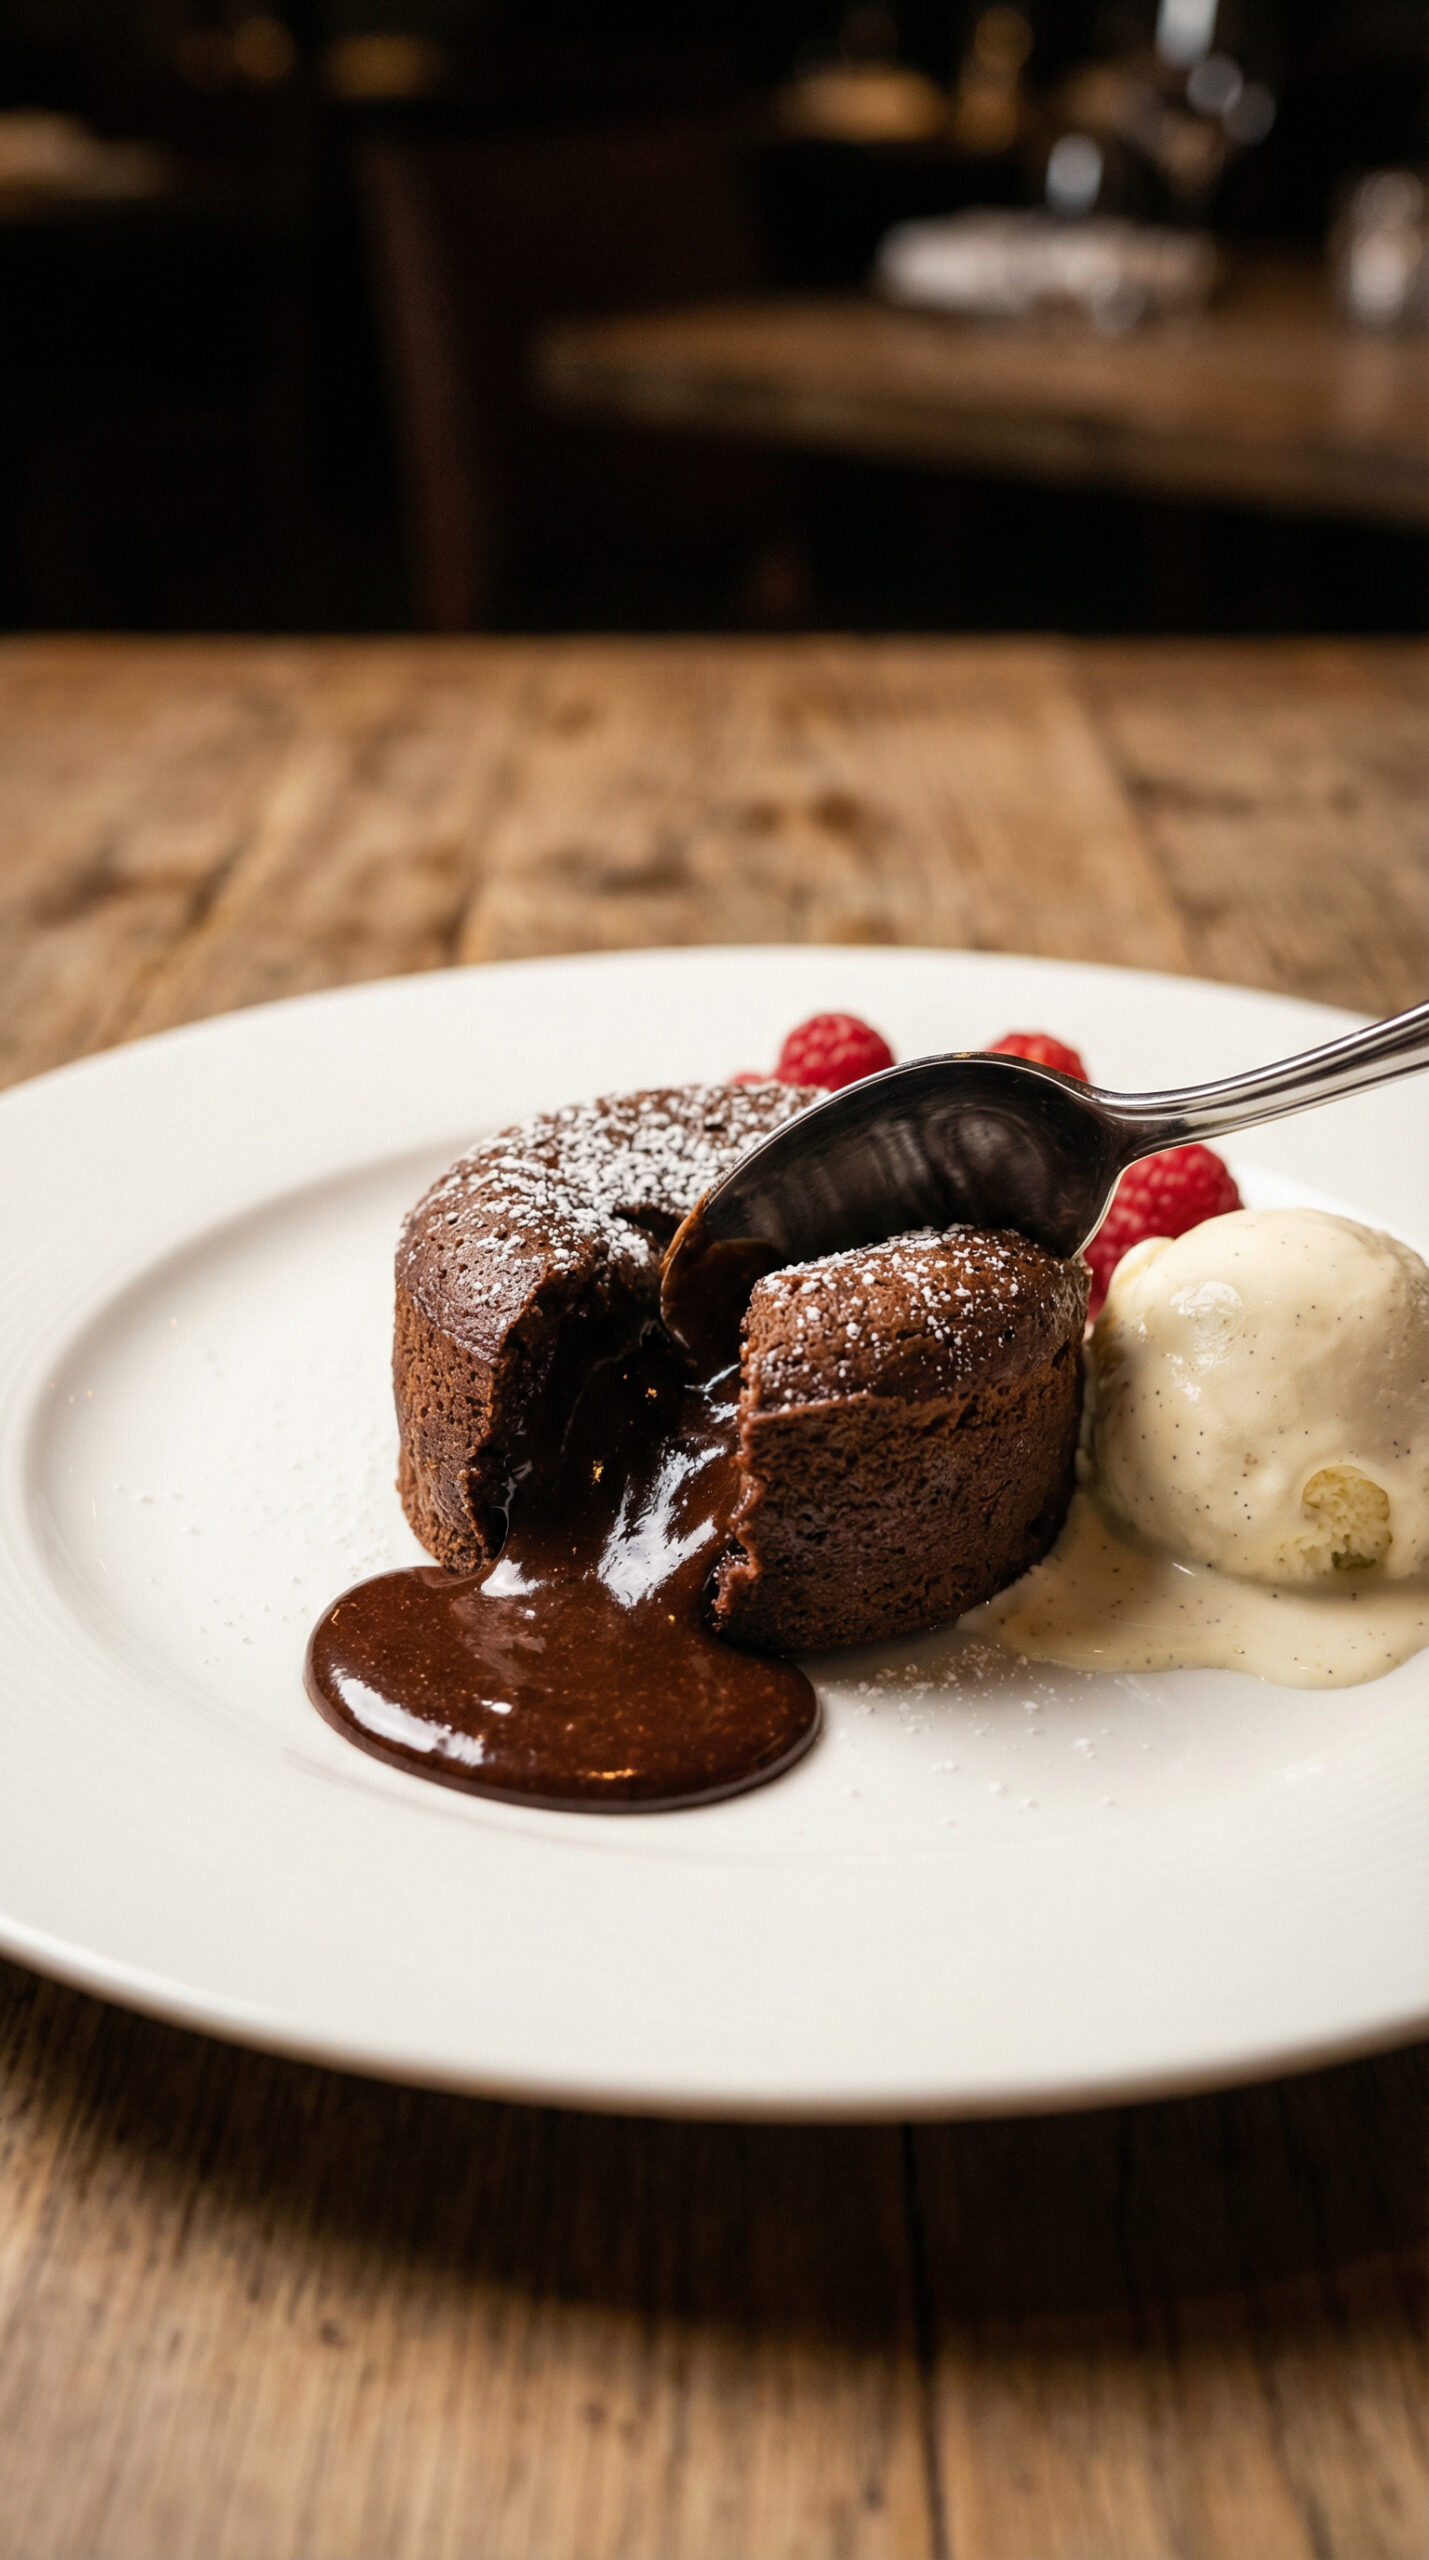
The classic pairing is a scoop of vanilla ice cream placed right next to (not on top of) the cake, so it melts into the lava when the cake is cut open.
Fresh raspberries add color and bright acidity that cuts through the richness.
A light dusting of powdered sugar through a fine mesh sieve makes them look professional.
A tiny pinch of flaky sea salt on top enhances the chocolate flavor dramatically.
For an adult version, serve alongside a small glass of port, Madeira, or a shot of espresso.
Drizzle the plate with raspberry coulis or caramel sauce before unmolding the cake on top for a restaurant-style presentation.
Make-Ahead and Storage
Same-day prep: Fill the ramekins, cover tightly with plastic wrap, and refrigerate for up to 24 hours. Bake directly from the refrigerator, adding 1-2 minutes to the baking time. The cold batter actually produces a more dramatically molten center.
Freezer prep (best method): Fill ramekins, cover tightly, and freeze for up to 2 months. Bake directly from frozen at 425°F for 14-16 minutes. Do not thaw first. This method is more forgiving than baking fresh batter.
Leftover storage: Refrigerate unmolded, cooled cakes in an airtight container for up to 2 days. Microwave individual cakes for 15-20 seconds to warm through. The center will be fudgy rather than molten, but they are still delicious.
Do not freeze baked cakes. The texture suffers significantly. Always freeze unbaked batter instead.
The Secret to Success
Lava cakes have a reputation for being finicky, but they’re really just about timing.
Every oven is different, every ramekin conducts heat differently, and even room temperature affects baking time.
Test one first, trust the jiggle, and err on the side of underbaking.
Once you know your exact timing, you can make these reliably every time.
WANT TO SAVE THIS FOR LATER?
We'll email it to you!
We won't send you spam. Unsubscribe at any time.