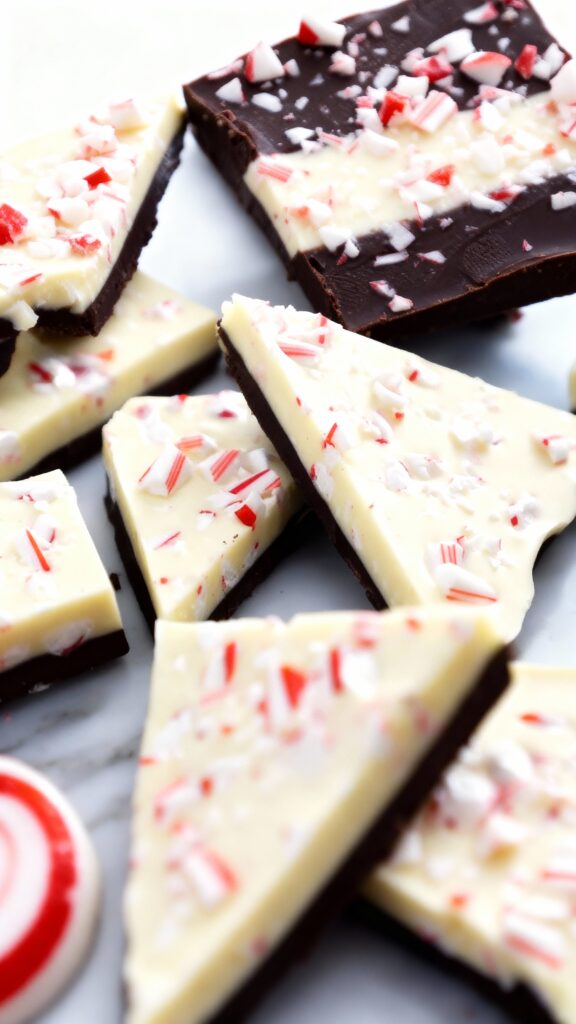
2-Layer Dark and White Chocolate Peppermint Bark
This peppermint bark features a layer of dark chocolate topped with white chocolate and crushed candy canes for the perfect holiday treat.
It takes about 15 minutes of hands-on time and looks like something from a gourmet candy shop.

WANT TO SAVE THIS FOR LATER?
We'll email it to you!
We won't send you spam. Unsubscribe at any time.
Why You’ll Love It
- Only 4 ingredients
- No candy thermometer or special equipment needed
- Ready in under an hour including setting time
- Makes a beautiful homemade gift
- The contrast of dark and white chocolate is striking
- Easily scaled up for large batches
Ingredients
- 12 ounces (340g) high-quality dark or semi-sweet chocolate, chopped
- 12 ounces (340g) high-quality white chocolate, chopped
- 1 teaspoon peppermint extract, divided
- 1 cup (about 6 ounces) crushed candy canes or peppermint candies
Steps
- Line a rimmed baking sheet with parchment paper.
- Place the chopped dark chocolate in a microwave-safe bowl.
- Microwave in 30-second intervals, stirring between each, until completely melted and smooth.
- This usually takes 2-3 minutes total.
- Stir in 1/2 teaspoon of peppermint extract.
- Pour the melted dark chocolate onto the prepared baking sheet.
- Use an offset spatula to spread it into an even layer about 1/4-inch thick.
- The chocolate does not need to reach the edges of the pan.
- Refrigerate for 15-20 minutes until the chocolate is set but not completely hard.
- It should be firm to the touch but still have some give when pressed.
- While the dark chocolate sets, melt the white chocolate using the same microwave method.
- White chocolate burns easily, so use 20-second intervals and stir frequently.
- Stir in the remaining 1/2 teaspoon of peppermint extract.
- Pour the melted white chocolate over the set dark chocolate layer.
- Spread evenly with a clean offset spatula.
- Immediately sprinkle the crushed candy canes over the white chocolate while it is still wet.
- Press the candy pieces gently into the chocolate so they stick.
- Refrigerate for at least 30 minutes until completely firm.
- Break or cut into irregular pieces.
Helpful Tips and Substitutions
Use high-quality chocolate for the best flavor and smoothest texture.
Chocolate chips contain stabilizers that prevent smooth melting, so chopped bar chocolate works better.
If you must use chips, add 1 teaspoon of coconut oil to help with melting and spreading.
Do not let any water come into contact with the chocolate or it will seize and become grainy.
Crush the candy canes in a sealed bag using a rolling pin, leaving some larger pieces for visual appeal.
For milk chocolate lovers, substitute milk chocolate for the dark chocolate layer.
Add a sprinkle of flaky sea salt over the white chocolate for a salted peppermint bark variation.
Timing the dark chocolate layer is important since if it hardens completely, the white chocolate will not adhere properly.
If the dark chocolate gets too hard, let the pan sit at room temperature for 10 minutes before adding the white layer.
Serving Ideas
Break into irregular shards for a rustic, artisanal look.
Package in clear cellophane bags with ribbon for holiday gifts.
Layer pieces in a decorative tin with parchment paper between layers.
Arrange on a platter with other holiday candies like fudge, toffee, and truffles.
Chop into small pieces and use as a topping for ice cream, brownies, or hot cocoa.
Make-Ahead and Storage
Peppermint bark stores exceptionally well, making it ideal for holiday prep.
Store in an airtight container at room temperature in a cool place for up to 2 weeks.
In warm environments, store in the refrigerator to prevent the chocolate from softening.
Layer pieces with wax paper or parchment to prevent sticking.
Freeze for up to 2 months in a freezer-safe container.
Thaw frozen bark at room temperature for 15-20 minutes before serving.
The candy cane pieces may become slightly sticky over time, which is normal and does not affect the taste.
Holiday Gifting Made Simple
Peppermint bark checks every box for homemade holiday gifts.
It looks impressive, tastes delicious, and requires minimal skill to make.
One batch makes enough to share with neighbors, teachers, and coworkers.
Keep a kitchen scale handy to measure chocolate accurately for consistent results.
WANT TO SAVE THIS FOR LATER?
We'll email it to you!
We won't send you spam. Unsubscribe at any time.