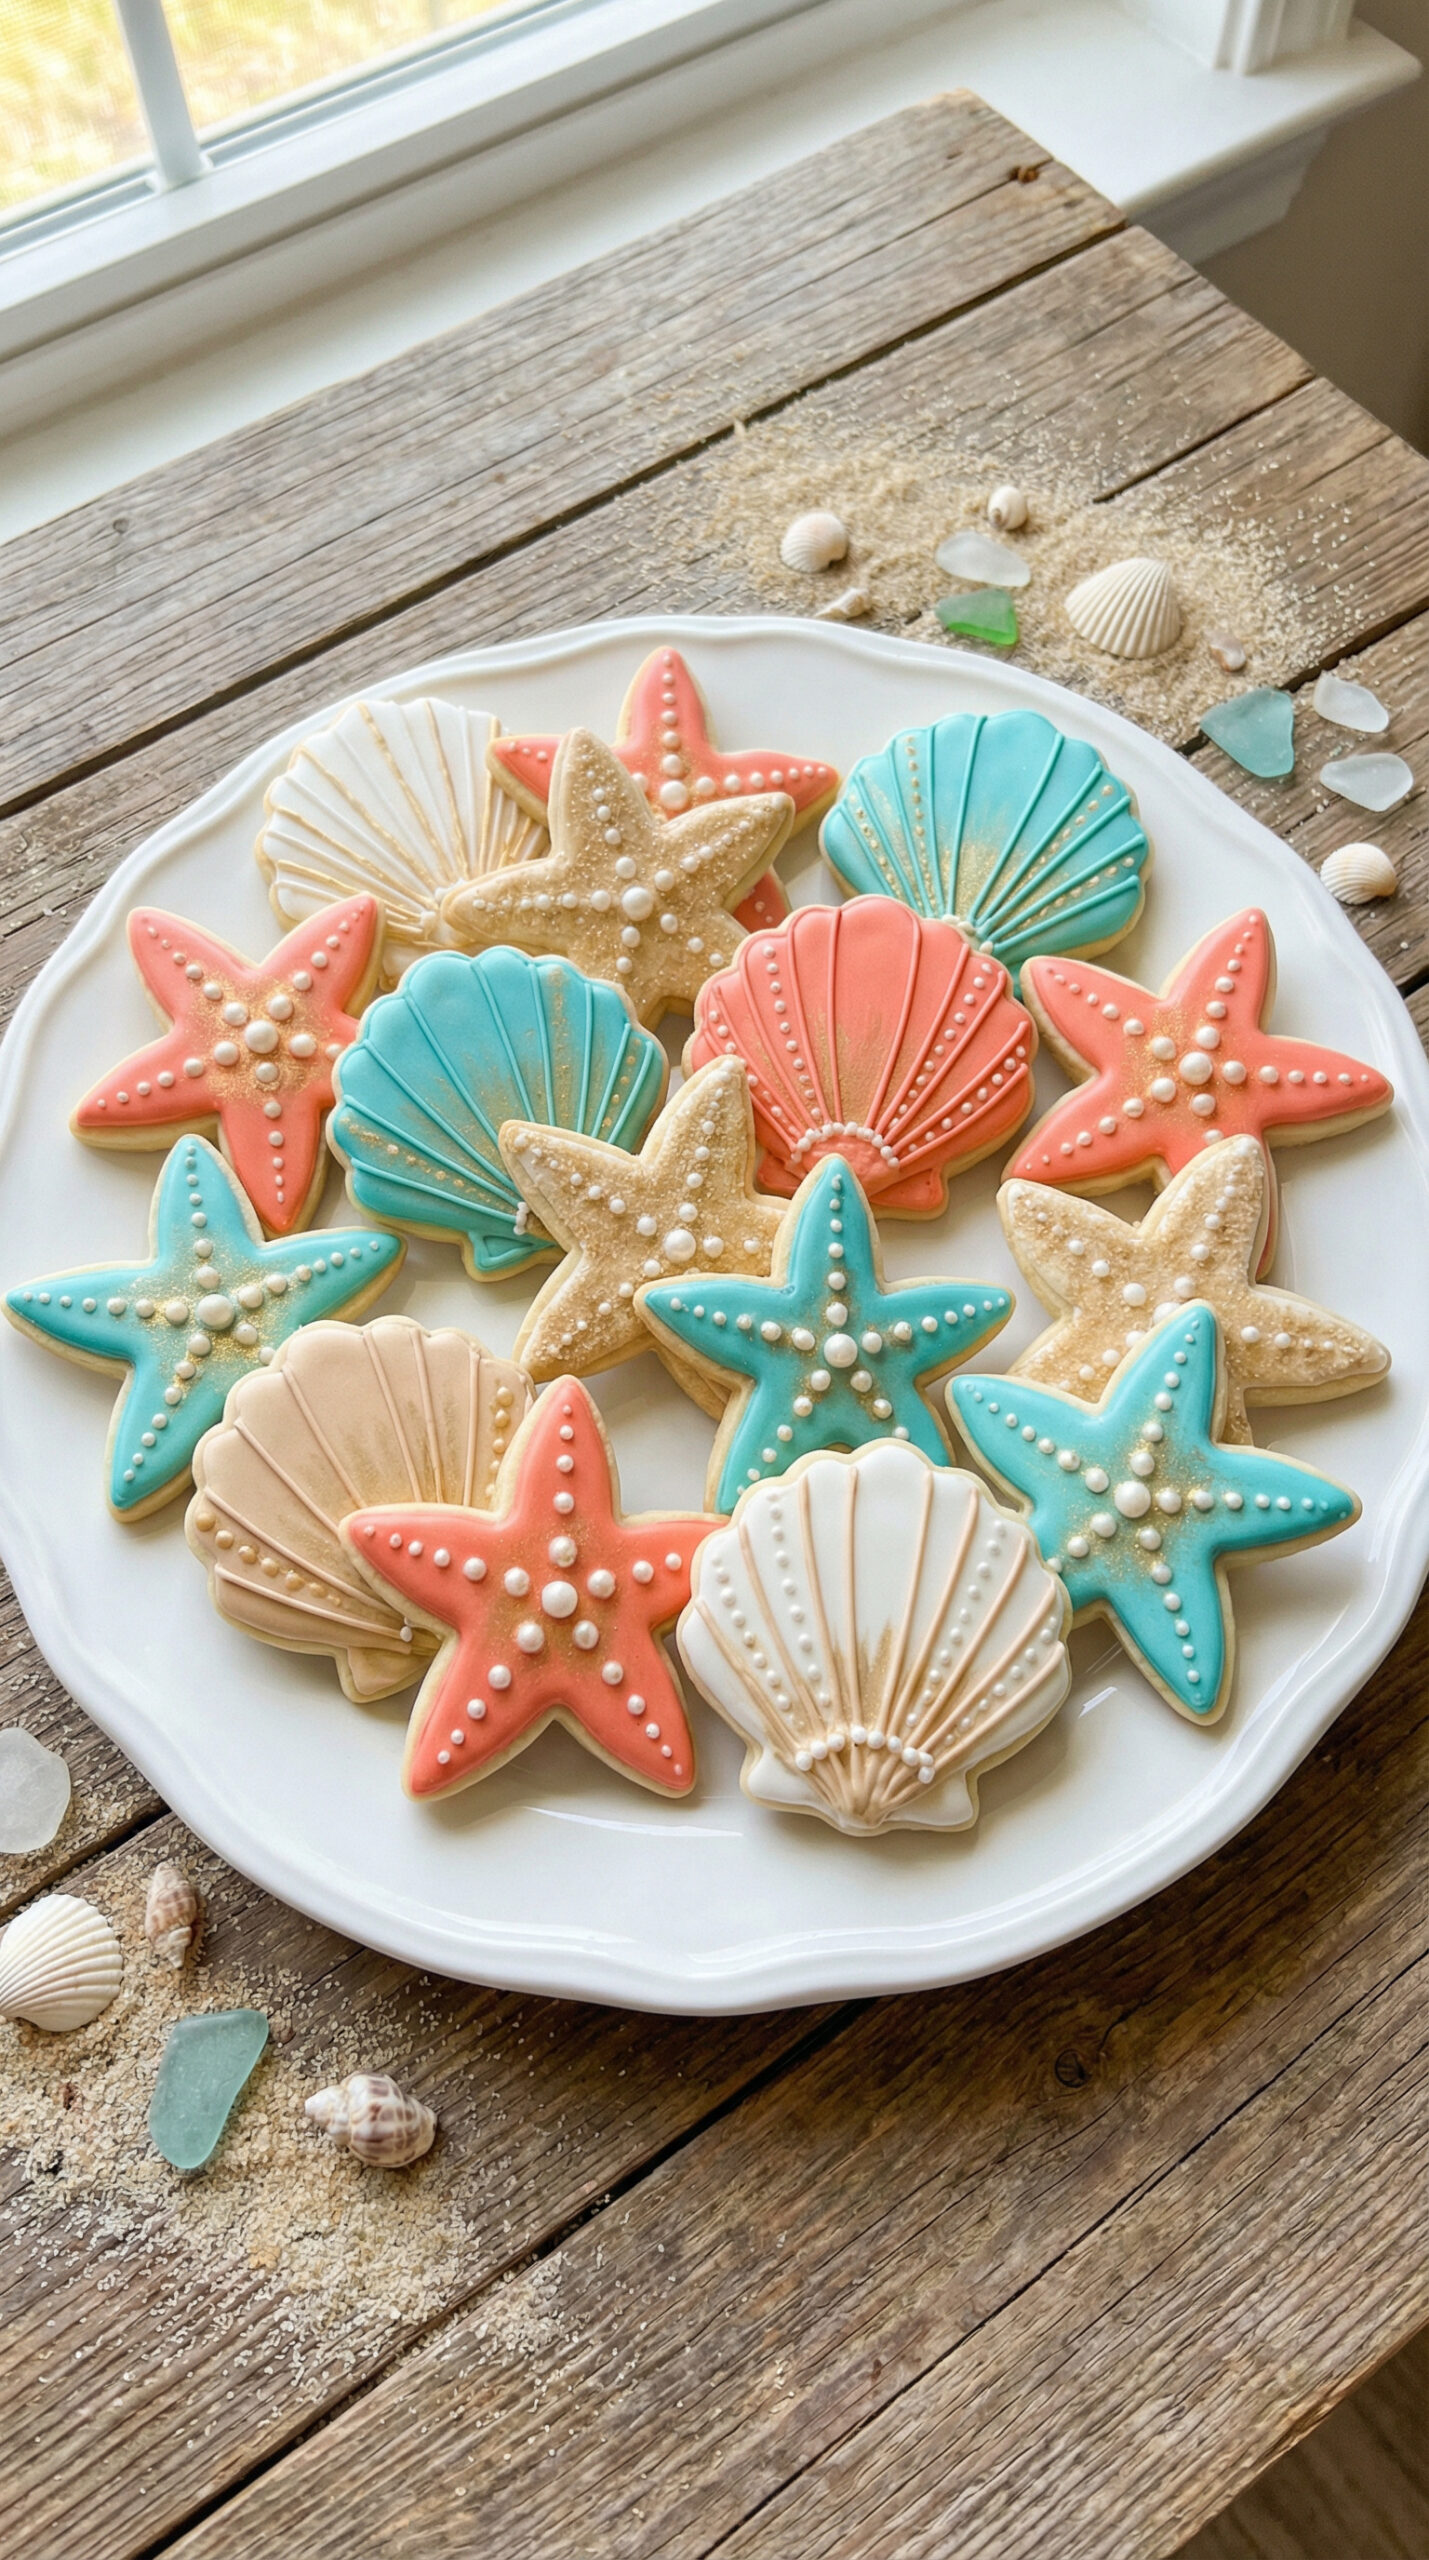
Starfish and Seashell Sugar Cookies
These buttery cut-out sugar cookies hold their shape perfectly during baking and provide a smooth canvas for royal icing decorations in beach-themed shapes.
The recipe is designed for minimal spread, so your starfish will still look like starfish when they come out of the oven.
WANT TO SAVE THIS FOR LATER?
We'll email it to you!
We won't send you spam. Unsubscribe at any time.
Why You’ll Love It
- Dough holds shape with zero spread during baking
- Cookies stay soft in the center with slightly crisp edges
- Royal icing dries hard for easy stacking and packaging
- Recipe makes a large batch for parties or gifts
- Dough can be made ahead and frozen
Ingredients
For the Sugar Cookies (makes about 36 medium cookies)
- 3 cups all-purpose flour
- 1 1/2 teaspoons baking powder
- 1/2 teaspoon salt
- 1 cup (2 sticks) unsalted butter, softened
- 1 cup granulated sugar
- 1 large egg, room temperature
- 2 teaspoons vanilla extract
- 1/2 teaspoon almond extract (optional but recommended)
For the Royal Icing
- 4 cups powdered sugar, sifted
- 3 tablespoons meringue powder
- 5-6 tablespoons water
- Gel food coloring (coral, turquoise, sandy beige, white)
For Decorating
- Sanding sugar in various colors
- Edible pearls
- Edible gold or silver luster dust
- Small food-safe paintbrush
Steps
Make the Cookie Dough
- Mix dry ingredients. Whisk flour, baking powder, and salt in a medium bowl. Set aside.
- Cream butter and sugar. In a stand mixer with paddle attachment, beat butter and sugar on medium-high for 2-3 minutes until light and fluffy.
- Add egg and extracts. Add egg, vanilla, and almond extract. Beat until combined, scraping down the bowl as needed.
- Add flour mixture. With mixer on low, gradually add flour mixture. Mix just until dough comes together. Don’t overmix or cookies will be tough.
- Chill the dough. Divide dough in half and flatten each portion into a disc. Wrap in plastic wrap and refrigerate for at least 1 hour or up to 3 days. Cold dough is essential for clean cuts.
Cut and Bake the Cookies
- Prep for rolling. Preheat oven to 350°F (175°C). Line baking sheets with parchment paper.
- Roll the dough. Working with one disc at a time (keep the other refrigerated), roll dough between two sheets of parchment paper to 1/4-inch thickness. If dough becomes too soft, refrigerate for 10 minutes.
- Cut shapes. Use starfish and seashell cookie cutters to cut shapes. Dip cutters in flour between cuts to prevent sticking. Transfer cookies to prepared baking sheets, spacing 1 inch apart.
- Chill cut cookies. Refrigerate the baking sheets for 10 minutes before baking. This extra chill prevents spreading.
- Bake. Bake for 9-11 minutes until edges are just barely starting to turn golden. The centers will look slightly underdone—that’s correct. They’ll firm up as they cool.
- Cool completely. Let cookies cool on the baking sheet for 5 minutes, then transfer to a wire rack. Cool completely before decorating, at least 1 hour.
Make the Royal Icing
- Combine ingredients. In a stand mixer with paddle attachment, combine powdered sugar and meringue powder. Add 5 tablespoons water. Beat on low until combined, then increase to medium-high and beat for 5-7 minutes until thick, glossy, and forms stiff peaks.
- Adjust consistency. For outlining, the icing should hold a stiff peak. For flooding (filling in), thin with water, 1/2 teaspoon at a time, until it flows like honey and a drizzled line disappears into the surface within 10 seconds.
- Divide and color. Separate icing into small bowls. Tint each with gel food coloring. Keep bowls covered with damp paper towels to prevent crusting.
Decorate the Cookies
- Outline first. Transfer stiff icing to piping bags fitted with small round tips (size 2 or 3). Pipe an outline around the edge of each cookie.
- Flood the cookies. Using thinned icing in a piping bag or squeeze bottle, fill in the outlined area. Use a toothpick to spread icing into corners and pop any air bubbles.
- Add details while wet. Sprinkle sanding sugar, add edible pearls, or pipe additional colors into the wet icing for marble effects. Work quickly before the icing sets.
- Let dry completely. Allow cookies to dry at room temperature for 6-8 hours or overnight. Don’t stack until fully hardened.
- Add final details. Once dry, use luster dust mixed with a tiny amount of vodka or lemon extract to paint golden accents with a small brush. The alcohol evaporates quickly, leaving a shimmery finish.
Helpful Tips and Substitutions
No meringue powder: Substitute 2 tablespoons pasteurized egg white powder, or use 2 fresh egg whites (note: icing won’t be shelf-stable with raw egg whites).
Icing too thick: Add water 1/2 teaspoon at a time until you reach desired consistency.
Icing too thin: Add more powdered sugar 1 tablespoon at a time. Over-thinned icing won’t hold its shape.
Cookies spreading: Dough wasn’t cold enough, or oven temperature is off. Use an oven thermometer to verify accuracy.
Gluten-free version: Replace all-purpose flour with a 1:1 gluten-free baking blend. Add 1/4 teaspoon xanthan gum if your blend doesn’t contain it.
Natural food coloring: Works but produces more muted colors. You may need more to achieve vibrant shades.
Serving Ideas
Display cookies standing upright in a bed of brown sugar “sand” in a shallow dish.
Package in clear cellophane bags tied with twine and a small shell charm for party favors.
Arrange on a tiered stand decorated with actual seashells (not for eating) and beach glass.
Use as place cards by piping guest names in icing before drying.
Make-Ahead and Storage
Unbaked dough: Refrigerate wrapped discs for up to 5 days, or freeze for up to 3 months. Thaw overnight in the refrigerator before rolling.
Baked, undecorated cookies: Store in an airtight container at room temperature for up to 2 weeks, or freeze for up to 3 months.
Decorated cookies: Once icing is fully dry, store in a single layer in an airtight container at room temperature for up to 2 weeks. Separate layers with parchment paper.
Royal icing: Store in an airtight container at room temperature for up to 2 weeks. Re-beat before using and adjust consistency with water as needed.
Do not refrigerate decorated cookies. Humidity causes icing to become sticky and colors to bleed.
Worth the Detail Work
Decorated sugar cookies require patience, but the results are edible art that people remember.
Start with simple designs—a solid color with a few pearls—and work up to more detailed decorations as you get comfortable with the icing.
These beach-themed cookies are perfect for summer parties, destination wedding favors, or anyone who loves the ocean.


WANT TO SAVE THIS FOR LATER?
We'll email it to you!
We won't send you spam. Unsubscribe at any time.