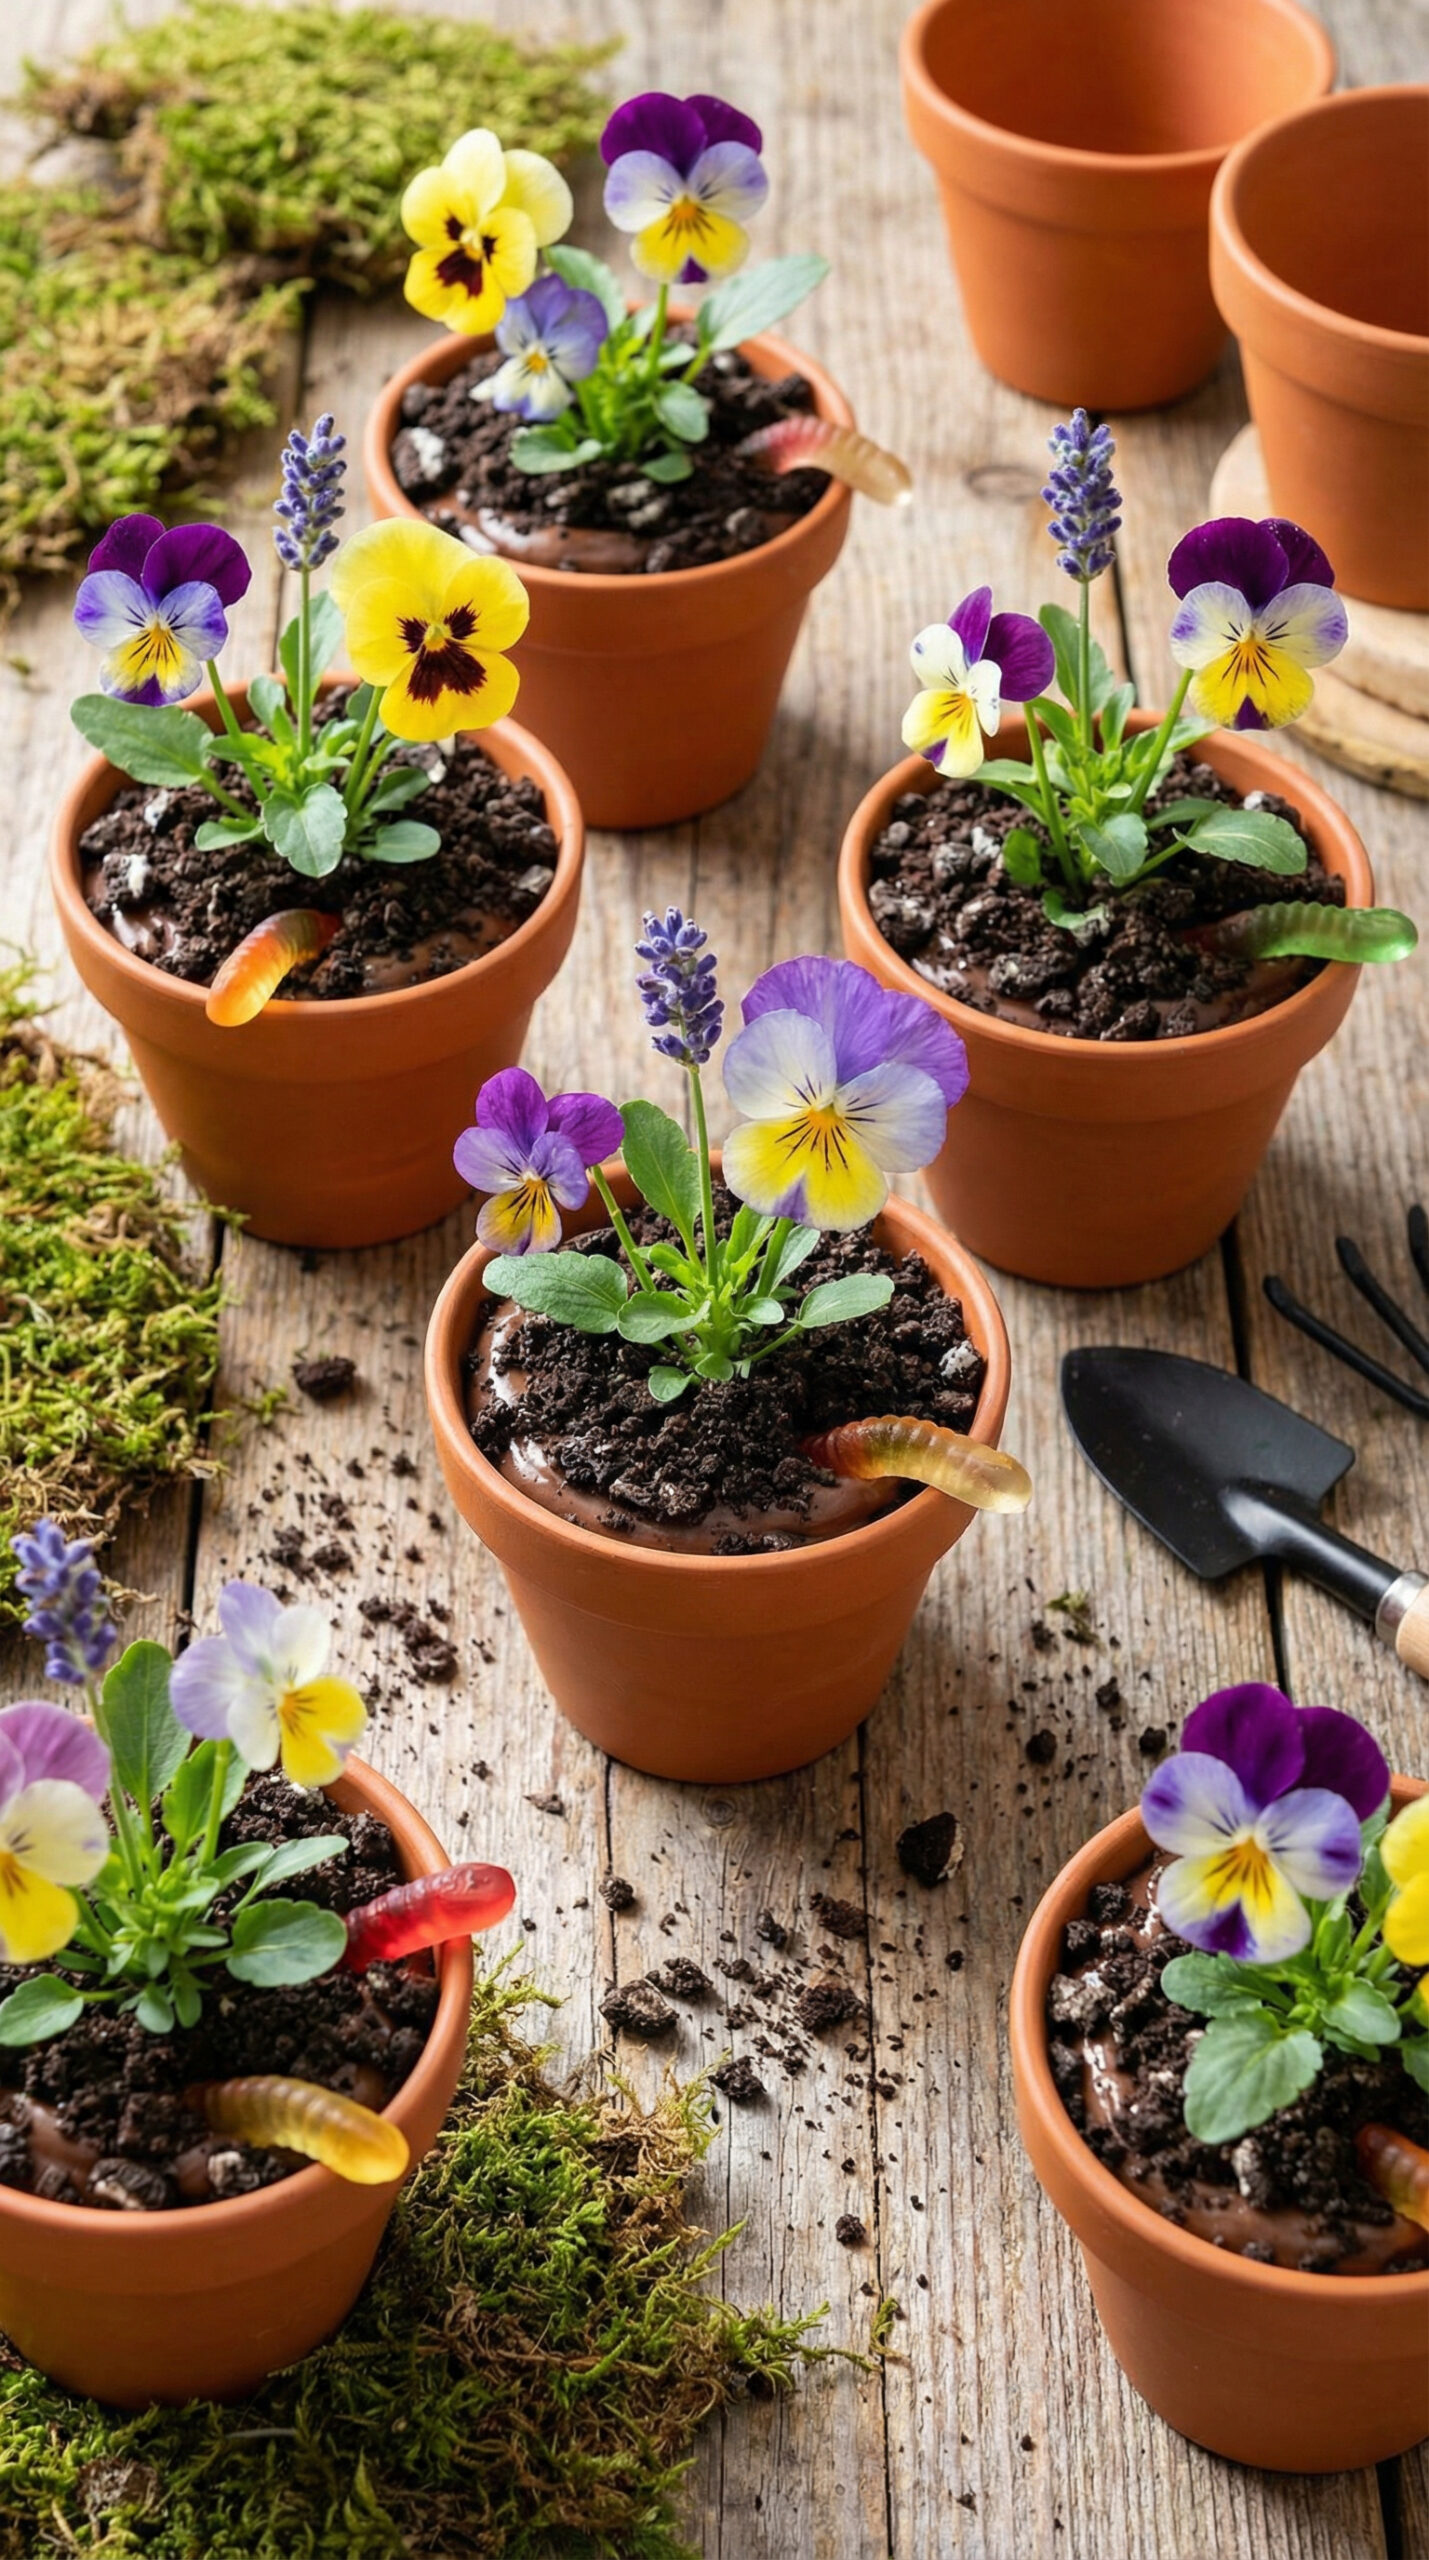
Spring Flower Pot Dessert Cups
These individual desserts look like miniature potted plants but are actually layers of chocolate pudding, crushed cookies, and edible flowers.
They’re a fun project to make with kids and always get a reaction at spring gatherings.
WANT TO SAVE THIS FOR LATER?
We'll email it to you!
We won't send you spam. Unsubscribe at any time.
Why You’ll Love It
- No baking required
- Can be assembled up to 24 hours ahead
- Customizable with different pudding flavors and flowers
- Perfect for Easter, garden parties, or spring birthdays
- Individual portions eliminate the need for slicing and serving
Ingredients
For the Dessert Cups (makes 8 servings)
- 1 package (3.4 oz) instant chocolate pudding mix
- 2 cups cold whole milk
- 8 oz cream cheese, softened
- 1 cup powdered sugar
- 8 oz whipped topping (like Cool Whip), thawed
- 1 package (14.3 oz) chocolate sandwich cookies (like Oreos)
- 8 new, food-safe small terracotta pots (4-inch) or clear plastic cups
- 8 paper straws or new wooden craft sticks
For the Flowers
- Candy flowers, gummy flowers, or fondant flowers
- Fresh edible flowers (pansies, violas, or nasturtiums)
- Green candy melts for leaves (optional)
- Fresh mint sprigs
Optional Base Layer
- 1 cup gummy worms for a “garden” effect
Steps
Prepare the Components
- Make the pudding. Whisk pudding mix and cold milk in a large mixing bowl for 2 minutes until thickened. Refrigerate for 5 minutes.
- Make the cream cheese layer. In a separate bowl, beat softened cream cheese and powdered sugar with a hand mixer until smooth, about 2 minutes. Fold in whipped topping until no streaks remain.
- Combine layers. Gently fold the cream cheese mixture into the set pudding until fully combined. The texture should be light and mousse-like.
- Crush the cookies. Place cookies in a zip-top bag and crush with a rolling pin until you have a mix of fine crumbs and small chunks. Alternatively, pulse in a food processor. You want varied textures to mimic real dirt.
Prepare the Pots
- If using terracotta pots: Wash thoroughly with hot soapy water and dry completely. Line the drainage hole with a small piece of parchment paper or foil to prevent leaking, or cover with a gummy worm.
- If using plastic cups: No preparation needed. Clear cups let guests see the layers, which kids especially enjoy.
Assemble the Desserts
- Add the first cookie layer. Spoon 2 tablespoons of crushed cookies into each pot or cup.
- Add the pudding mixture. Spoon or pipe pudding mixture on top, filling about two-thirds of the container. Tap gently on the counter to remove air bubbles.
- Add the dirt topping. Cover the pudding completely with crushed cookies, pressing down lightly. The surface should look like fresh potting soil.
- Add gummy worms (optional). Tuck gummy worms partway into the “dirt” so they appear to be crawling out.
Create the Flowers
- Prepare the stems. Cut paper straws to about 4–5 inches. If using craft sticks, paint them green with food-safe paint and let dry completely.
- Attach candy flowers. Use a small dab of melted chocolate or candy melts to attach candy flowers to the top of each straw. Let set for 5 minutes.
- Using fresh edible flowers: Insert the flower stems directly into the dessert just before serving. Pansies and violas work best because they’re sturdy and the entire flower is edible.
- Add leaves. Tuck fresh mint sprigs around the flowers, or pipe green candy melt leaves onto parchment, let set, then insert into the dessert.
Helpful Tips and Substitutions
Pudding alternatives: Vanilla pudding works for a “sandy soil” look. Pistachio pudding creates a fun green “moss” effect when topped with crushed cookies.
Cookie substitutions: Chocolate graham crackers or chocolate teddy grahams can replace sandwich cookies. Crush them the same way.
Dairy-free version: Use dairy-free cream cheese, coconut whipped cream, and plant-based milk with instant pudding. Check that your cookies are dairy-free as well.
Make it lighter: Use sugar-free pudding mix and light whipped topping to reduce calories without sacrificing the fun presentation.
Edible flower sources: Purchase edible flowers from grocery stores in the produce section, farmers markets, or specialty food suppliers. Never use flowers from florists or garden centers—these may have been treated with pesticides.
New pots only: If using terracotta, buy new pots specifically for food use. Used garden pots may contain fertilizers, pesticides, or bacteria.
Serving Ideas
Place each pot on a small saucer with a miniature garden trowel as a spoon for a complete garden theme.
Arrange multiple pots on a wooden tray lined with sheet moss for a garden centerpiece.
Set up a “potting station” at kids’ parties where children can add their own gummy worms and flowers.
For adults, garnish with edible flowers and a light dusting of cocoa powder for an elegant presentation.
Make-Ahead and Storage
Assembled desserts (without flowers): Cover with plastic wrap and refrigerate for up to 24 hours. The cookie layer will soften slightly, which many people prefer.
Pudding mixture alone: Refrigerate in an airtight container for up to 3 days. Assemble when ready to serve.
Crushed cookies: Store in a sealed bag at room temperature for up to 1 week.
Fresh flowers: Add just before serving. They’ll wilt within a few hours once inserted into the dessert.
Candy flowers: Can be added up to 24 hours ahead if stored in the refrigerator.
Freezing: Not recommended. The pudding texture changes when frozen and thawed.
A Fun One to Make
These dessert cups are more about presentation than technical skill, which makes them perfect for involving kids or putting together quickly for a party.
The combination of creamy chocolate pudding with crunchy cookie “dirt” gives you satisfying texture contrasts in every bite.
Customize the flowers and colors to match any spring celebration, and don’t be surprised when guests ask how you made them.
WANT TO SAVE THIS FOR LATER?
We'll email it to you!
We won't send you spam. Unsubscribe at any time.