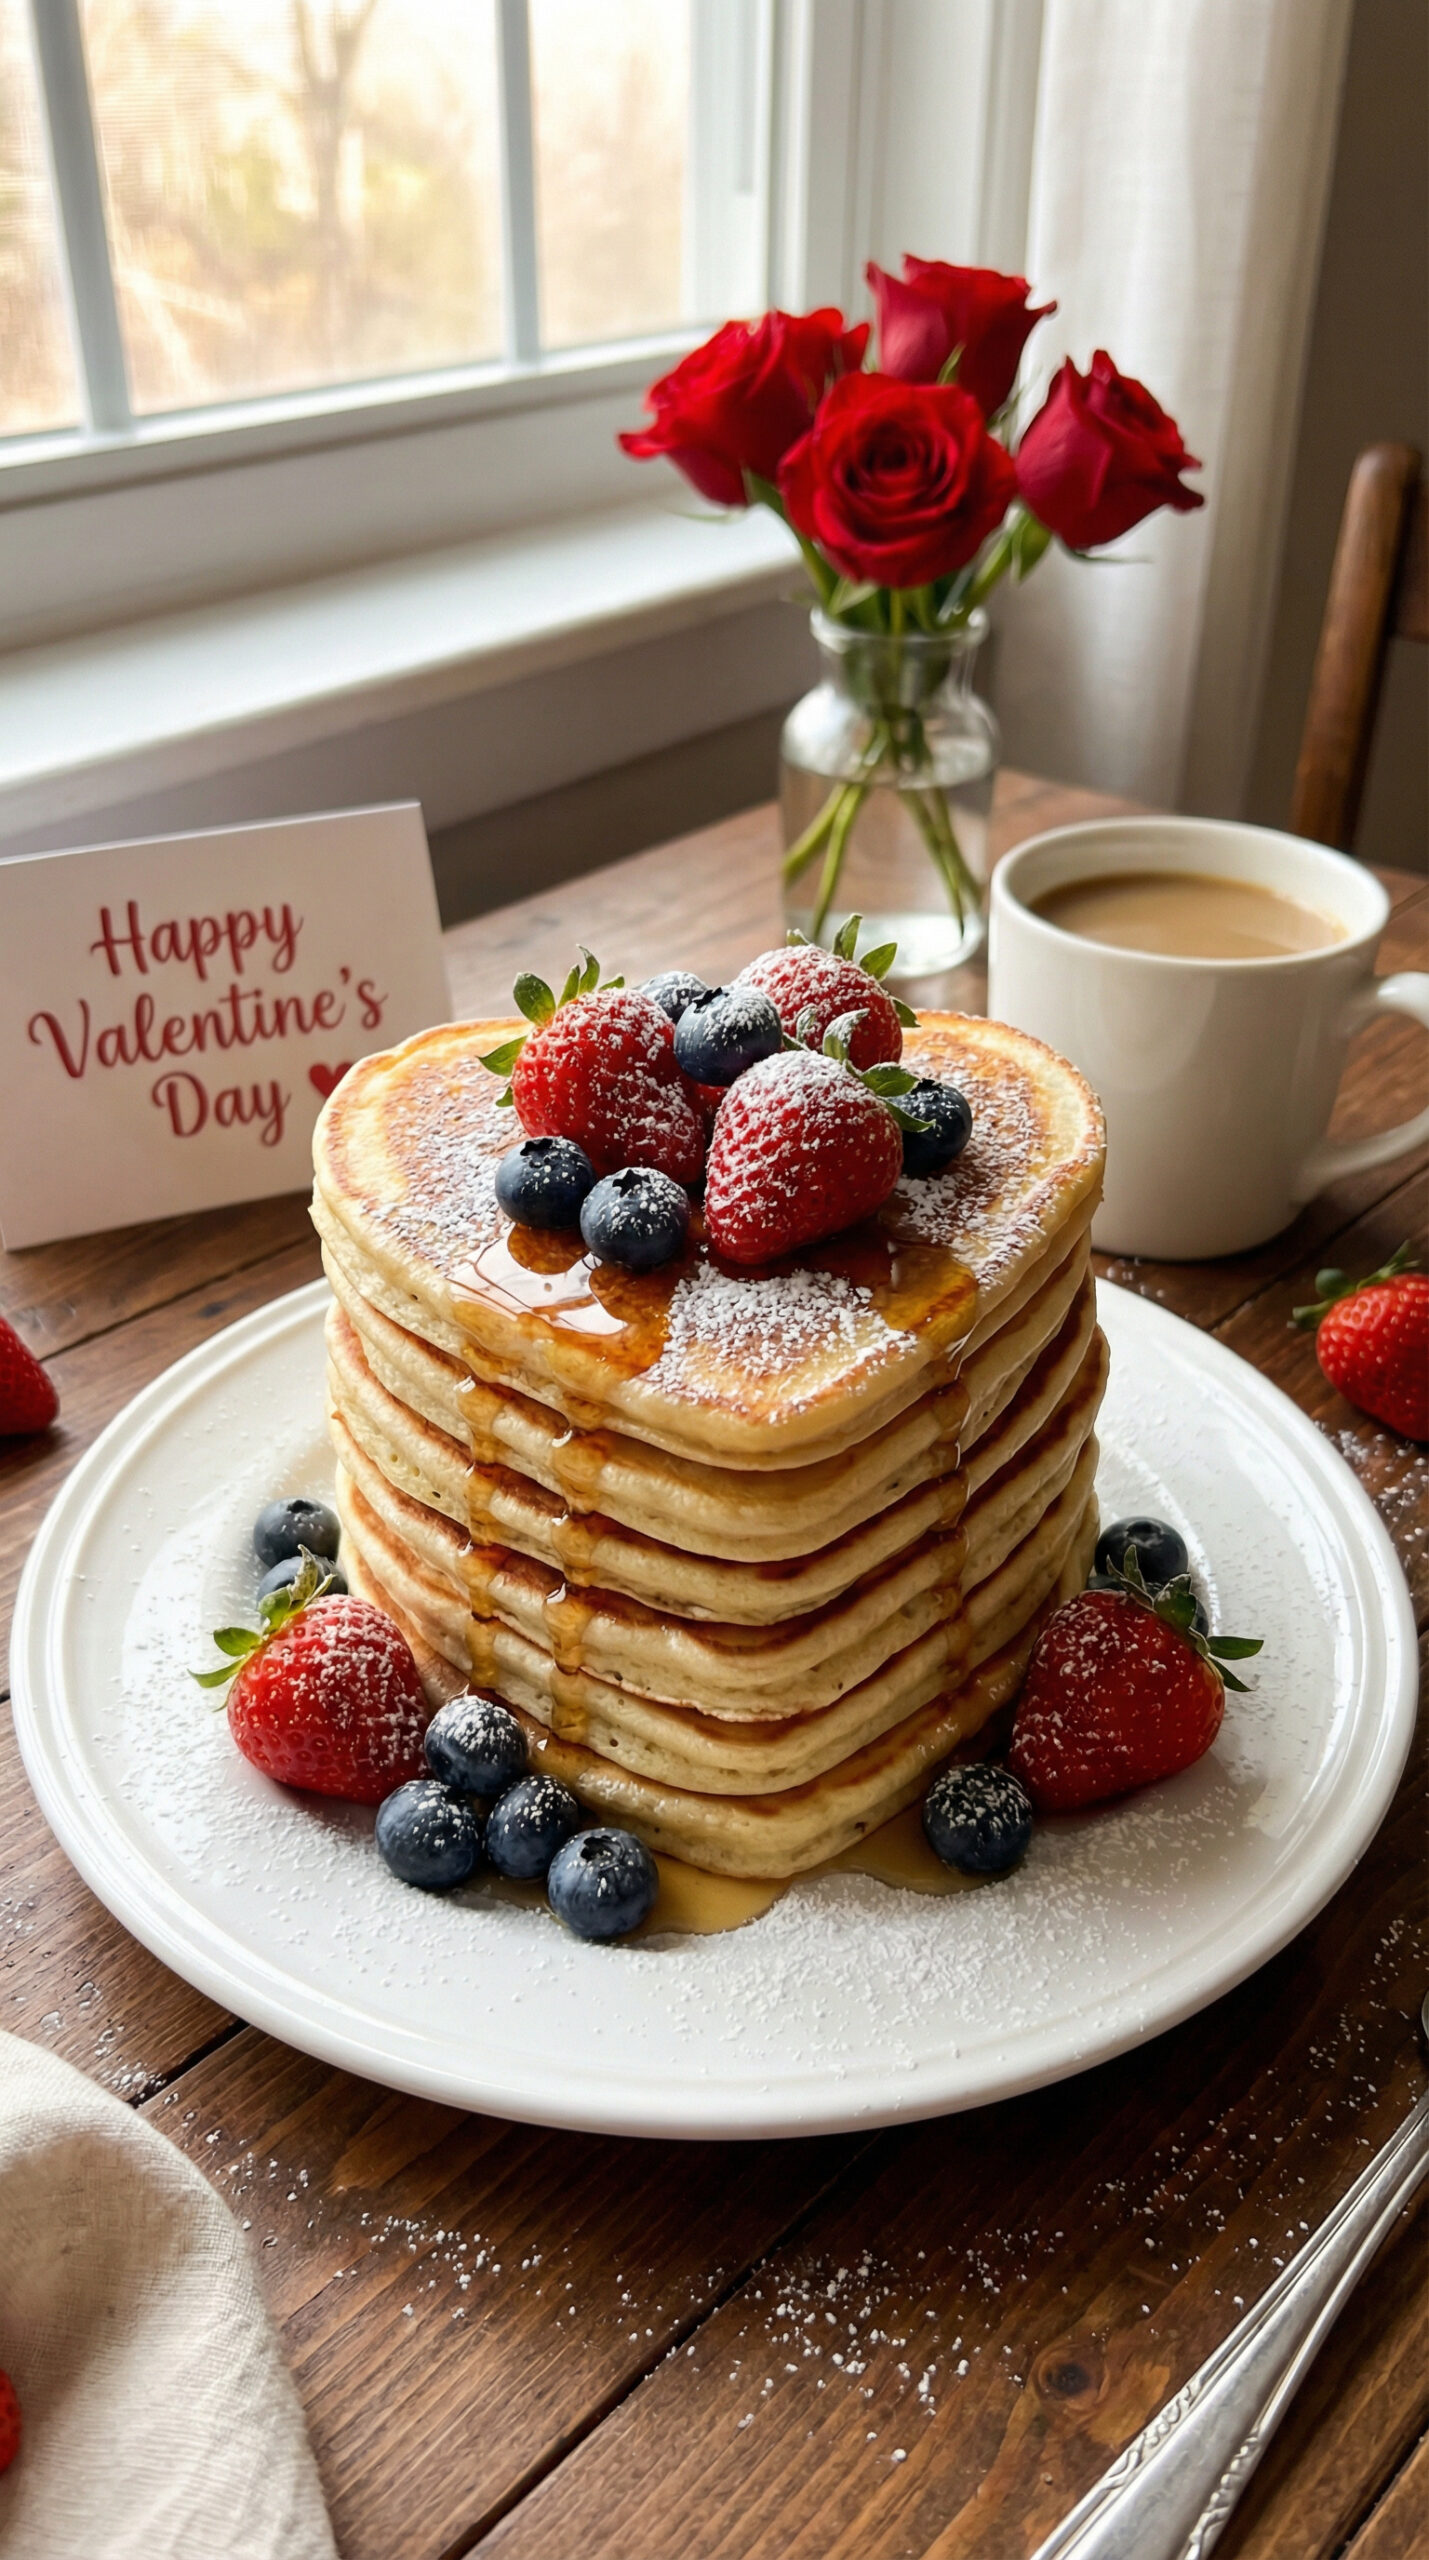
Heart-Shaped Pancakes
Fluffy buttermilk pancakes shaped into hearts using either a mold or freehand squeeze bottle technique.
Start Valentine’s Day morning with a romantic breakfast in bed, or make these for a cozy Galentine’s brunch with your best friends.
The base recipe produces tall, tender pancakes with slightly crisp edges, and the shaping adds only a few extra seconds per pancake.
WANT TO SAVE THIS FOR LATER?
We'll email it to you!
We won't send you spam. Unsubscribe at any time.
Why You’ll Love It
- No special skills required for the mold method
- Uses basic pantry ingredients
- Two shaping methods to suit different skill levels
- Kids love helping with cutting and flipping
- The techniques work with any pancake recipe or boxed mix
Ingredients
For the Pancakes (makes 10-12 medium pancakes):
- 1 1/2 cups (188g) all-purpose flour
- 2 tablespoons granulated sugar
- 1 1/2 teaspoons baking powder
- 1/2 teaspoon baking soda
- 1/2 teaspoon fine salt
- 1 1/3 cups buttermilk, at room temperature
- 1 large egg, at room temperature
- 3 tablespoons unsalted butter, melted and cooled slightly
- 1 teaspoon pure vanilla extract
For cooking:
- Butter, vegetable oil, or cooking spray for the griddle
For serving:
- Pure maple syrup
- Softened butter
- Fresh berries, sliced bananas, or other fruit (optional)
- Whipped cream (optional)
- Powdered sugar for dusting (optional)
Steps
1. Whisk the dry ingredients.
In a large bowl, whisk together the flour, sugar, baking powder, baking soda, and salt until evenly combined.
This ensures the leavening is distributed throughout, so every pancake rises evenly.
2. Combine the wet ingredients.
In a measuring cup or small bowl, whisk together the buttermilk, egg, cooled melted butter, and vanilla.
The butter should be melted but not hot; hot butter can partially cook the egg when they’re combined and will make the batter greasy.
If your buttermilk is cold, the melted butter may solidify into small bits when added; this is fine and won’t affect the final pancakes.
3. Mix the batter properly.
Pour the wet ingredients into the dry ingredients.
Stir with a fork or whisk until just combined, about 15-20 stirs.
The batter should still have small to medium lumps throughout; this is correct.
Do not keep stirring until smooth; overmixed pancake batter develops gluten, which makes tough, chewy pancakes instead of tender, fluffy ones.
It’s better to have a few lumps than to overmix.
4. Let the batter rest.
Set the batter aside for 5-10 minutes while you heat your cooking surface.
During this rest, the baking powder and baking soda begin producing bubbles, the gluten relaxes (making the pancakes more tender), and the flour fully hydrates.
You’ll notice the batter thickens slightly and looks puffier after resting.
5. Heat your cooking surface correctly.
Heat a nonstick griddle or large skillet over medium heat (not medium-low or medium-high).
If using an electric griddle, set it to 325-350°F.
Let the surface heat for at least 3-4 minutes to ensure even heat distribution.
Test the temperature by sprinkling a few drops of water on the surface: they should sizzle and evaporate within 2-3 seconds.
If the water immediately vaporizes with an aggressive sizzle, the pan is too hot; if it just sits there, the pan is too cool.
Lightly grease the surface with butter, oil, or cooking spray.
Wipe away excess with a paper towel; too much fat causes uneven browning.
Shaping Method 1: Using a Mold (Easiest)
6a. Prepare and place the mold.
Use a silicone heart-shaped mold or metal egg ring shaped like a heart.
Silicone molds are easier to work with because they don’t get as hot and flex for easy release.
Spray the inside of the mold with cooking spray or brush lightly with oil.
Place the mold flat on the heated, greased griddle.
7a. Fill and cook.
Pour about 1/4 cup of batter into the center of the mold.
Use a spoon or spatula to gently spread the batter to fill the mold completely, especially into the point of the heart.
Cook until bubbles form across the entire surface and the edges look set and slightly dry, about 2-3 minutes.
8a. Remove mold and flip.
Using tongs or a heat-resistant glove, carefully lift the mold straight up.
If the pancake sticks to the mold, run a thin spatula around the inside edge to release it.
Slide a spatula under the pancake and flip.
Cook for another 1-2 minutes until the second side is golden brown.
Re-grease the mold before each use.
Shaping Method 2: Freehand with Squeeze Bottle (More Control)
6b. Prepare the batter for piping.
Standard pancake batter is too thick to flow smoothly through a squeeze bottle.
Thin the batter by stirring in 2-4 tablespoons of additional buttermilk or milk until it flows in a steady stream when poured from a spoon.
Transfer the thinned batter to a squeeze bottle with a wide opening, or use a zip-top bag with about 1/2 inch cut from one corner.
7b. Draw the heart outline first.
Working on the heated, greased griddle, squeeze a thin line of batter to draw the outline of a heart: start with two rounded humps at the top that meet in the center, then angle down to a point at the bottom.
Make the outline about 1/4 inch wide so it has structure.
The outline will start cooking and setting while you work.
8b. Fill in the center.
Quickly fill in the heart outline with more batter, working in a zigzag pattern to cover the entire interior.
The batter should flow together; gently tap the griddle or use a spoon to help it spread into any gaps.
Don’t worry if it’s not perfect; slightly irregular hearts look homemade and charming.
9b. Cook and flip.
Cook until bubbles form, rise to the surface, and mostly pop, and the edges look set, about 2-3 minutes.
Slide a thin spatula under the pancake and flip.
Cook for another 1-2 minutes until golden brown.
Practice makes perfect with this method; your first few attempts may look rough, but you’ll improve quickly.
Finishing the Pancakes
9/10. Keep pancakes warm while cooking the rest.
Place finished pancakes in a single layer on a baking sheet in a 200°F oven.
Do not stack them or cover them, which would trap steam and make them soggy.
Pancakes can stay warm this way for up to 20 minutes.
10/11. Serve immediately.
Stack pancakes on plates and serve with butter, warm maple syrup, and your chosen toppings.
Pancakes are best eaten right away; they lose their fluffiness as they sit.
Helpful Tips and Substitutions
Why buttermilk? Buttermilk is acidic, which reacts with the baking soda to create extra lift and produces a tender, slightly tangy pancake. It also helps tenderize the gluten, making for a softer texture.
No buttermilk? Make a substitute by adding 1 tablespoon of white vinegar or lemon juice to a liquid measuring cup, then filling to the 1 1/3 cup line with regular milk. Let it sit for 5 minutes until slightly thickened. This creates “soured milk,” which mimics the acidity of buttermilk.
How to know when to flip: Wait until bubbles form across the entire surface, rise up through the batter, and pop, leaving small holes. The edges should look dry and set, not wet. Flipping too early means the interior isn’t set and the pancake will fold or tear.
Uneven browning? This usually means uneven heat. Electric griddles are more consistent than stovetop pans. If using a pan, let it heat longer before starting, and rotate it occasionally during cooking.
Pancakes too dense? You likely overmixed the batter or the baking powder is old. Test baking powder by adding a teaspoon to 1/3 cup hot water; it should bubble vigorously.
Make it whole wheat: Replace up to half the all-purpose flour with whole wheat flour. Add an extra 2 tablespoons of buttermilk to compensate for the extra absorption.
Using boxed mix: Prepare the mix according to package directions and use either shaping method described above. Thin the batter slightly if using the squeeze bottle method.
Serving Ideas
Set up a pancake toppings bar with maple syrup, honey, Nutella, fresh strawberries, blueberries, banana slices, whipped cream, and chocolate chips.
Make mini hearts (silver dollar size) using a small mold or less batter for kid-sized portions.
Stack three graduated sizes (large, medium, small) for a tiered heart presentation.
Dust with powdered sugar through a fine mesh sieve for a pretty finish.
Serve alongside crispy bacon, sausage links, and scrambled eggs for a complete breakfast.
Make-Ahead and Storage
Dry mix prep: Combine all dry ingredients in a jar or container up to 2 months ahead. Label with the wet ingredients needed. In the morning, just add the wet ingredients and you’re ready to cook.
Batter: Pancake batter doesn’t hold well; the leavening starts working immediately and loses power over time. Mix fresh for best results. If you must make ahead, refrigerate for no more than 1 hour.
Cooked pancakes: Cool completely on a wire rack. Store in an airtight container in the refrigerator for up to 3 days, layered with parchment paper to prevent sticking.
Freezing: Lay cooled pancakes in a single layer on a baking sheet and freeze until solid (about 1-2 hours). Transfer to a freezer bag, removing as much air as possible. Freeze for up to 2 months.
Reheating: Toast frozen pancakes directly in a toaster or toaster oven (2 cycles usually) until heated through. Alternatively, microwave 1-2 pancakes for 30-45 seconds, or reheat in a single layer on a baking sheet in a 350°F oven for 5-7 minutes.
Simple but Special
Heart-shaped pancakes require only a few extra seconds per pancake but completely transform a regular breakfast into something memorable.
The mold method is nearly foolproof for beginners, while the squeeze bottle technique offers more creative freedom once you get the hang of it.
Either way, imperfect hearts are still delicious hearts.
WANT TO SAVE THIS FOR LATER?
We'll email it to you!
We won't send you spam. Unsubscribe at any time.