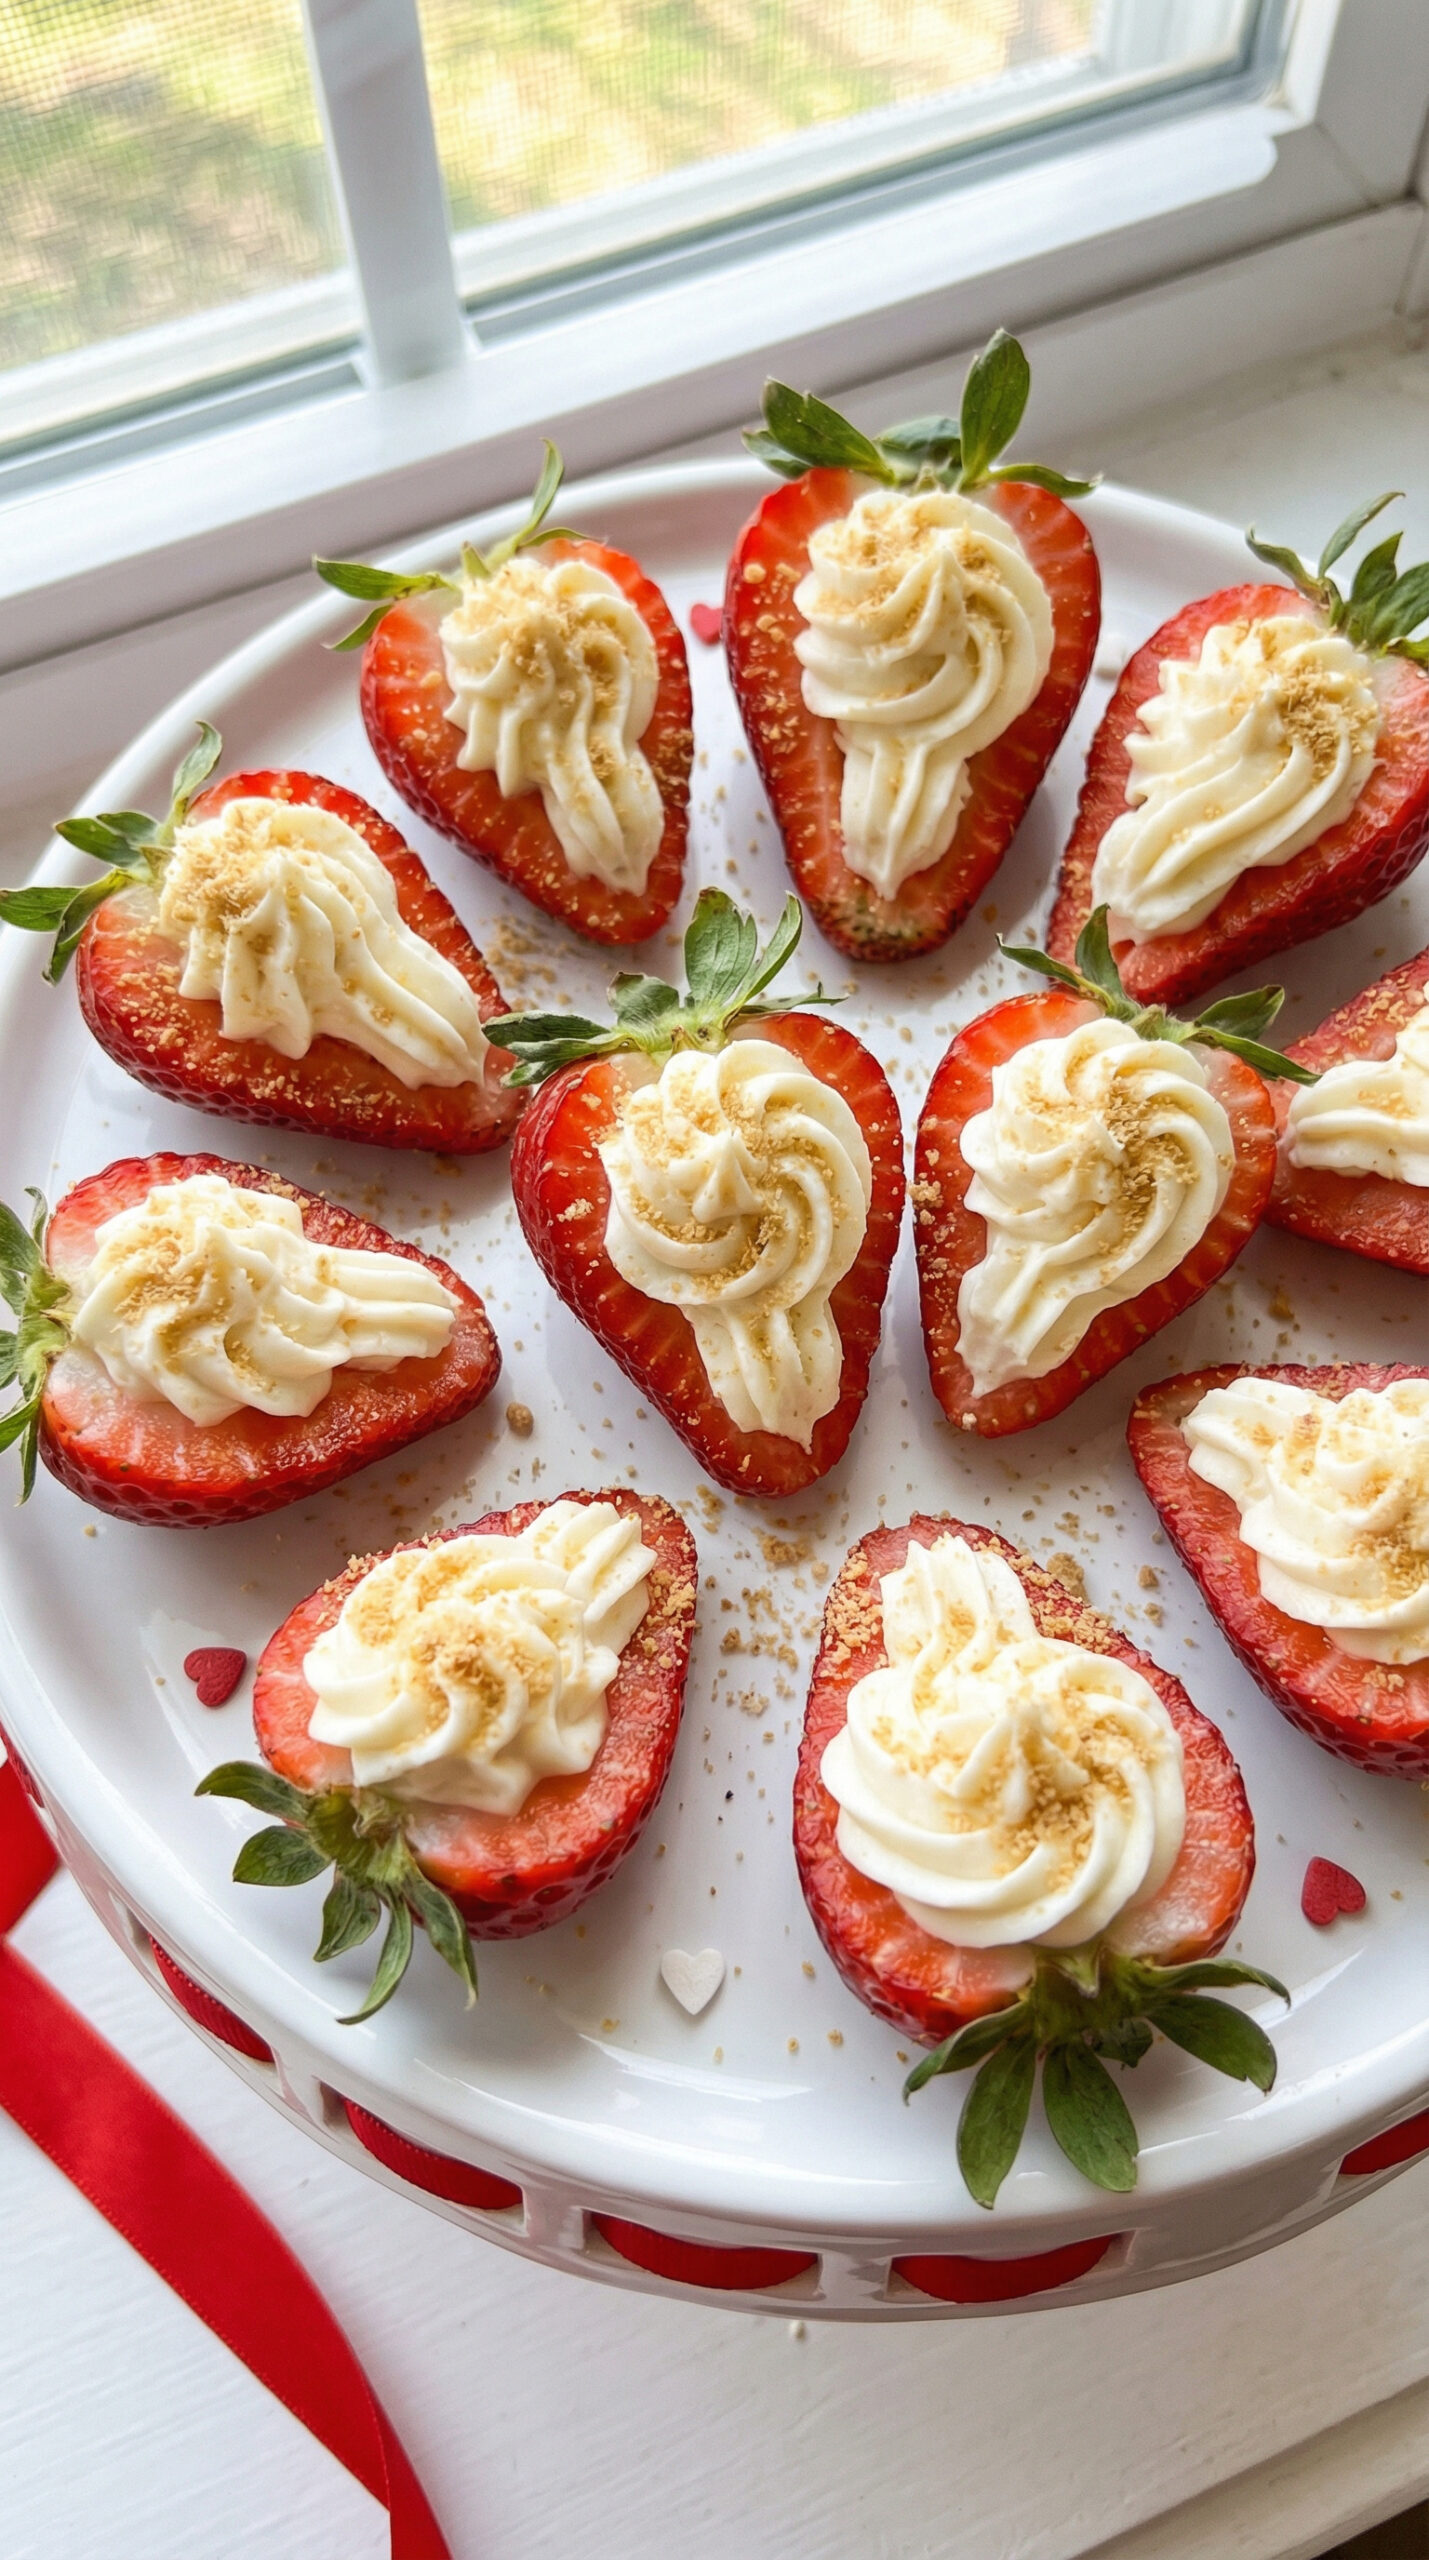
Cheesecake Stuffed Strawberries
Large fresh strawberries hollowed out and filled with a tangy, creamy no-bake cheesecake filling, then topped with graham cracker crumbs for that classic crust flavor.
These adorable bites are a Valentine’s Day favorite, whether you’re planning a romantic dessert for two or a sweet treat for your Galentine’s party.
They deliver everything you love about cheesecake in a two-bite, portion-controlled, no-oven-required package.
WANT TO SAVE THIS FOR LATER?
We'll email it to you!
We won't send you spam. Unsubscribe at any time.
Why You’ll Love It
- Absolutely no baking required
- Start to finish in about 30 minutes
- Built-in portion control for dessert tables
- Easy to scale up for parties
- Lighter and more refreshing than actual cheesecake
- Impressive presentation with minimal effort
Ingredients
Makes 24 stuffed strawberries
- 24 large fresh strawberries (about 1 1/2 pounds)
- 8 ounces (one brick) cream cheese, at room temperature
- 1/2 cup (60g) powdered sugar, sifted
- 1 teaspoon pure vanilla extract
- 1/4 cup sour cream or plain Greek yogurt
- 3-4 tablespoons graham cracker crumbs (from about 2 whole graham crackers)
Optional toppings and variations:
- 2 tablespoons mini chocolate chips (fold into filling)
- Zest of 1 lemon plus 1 tablespoon lemon juice (for lemon cheesecake)
- Crushed pistachios, chopped pecans, or toasted coconut
- Drizzle of melted chocolate, caramel sauce, or raspberry sauce
- Pinch of cinnamon mixed into the graham cracker crumbs
Selecting the Right Strawberries
Not all strawberries work well for stuffing.
You need berries that are large enough to hold a meaningful amount of filling, firm enough to hollow without falling apart, and shaped so they can stand upright.
What to look for:
Choose the largest strawberries in the container, ideally at least 1.5 inches long from stem to tip.
Look for berries with a flat bottom where the stem meets the berry; conical berries that come to a point won’t stand up.
Select firm berries that give slightly when pressed but aren’t soft or mushy.
Avoid overripe berries (too soft, will collapse when hollowed) and underripe berries (too firm and not sweet enough).
The strawberries should smell fragrant and sweet.
Steps
1. Soften the cream cheese properly first.
Set the cream cheese on the counter 45-60 minutes before starting.
It should be soft enough that you can easily press your finger into it, but not so warm that it’s greasy or melting.
For a shortcut, remove the cream cheese from its wrapper, place on a microwave-safe plate, and microwave in 10-second bursts until softened, checking after each burst.
Cream cheese that isn’t fully softened will leave lumps in your filling that won’t pipe smoothly.
2. Wash and dry the strawberries thoroughly.
Rinse the strawberries under cool running water.
Pat completely dry with paper towels or let air dry on a clean kitchen towel.
Any water left on the berries will make the filling slide off and the graham cracker crumbs soggy.
3. Create a flat base.
Using a sharp paring knife, slice off the green stem end and a thin layer of the top of each strawberry to create a flat surface.
This allows the strawberry to stand upright on a platter without tipping over.
Don’t cut too much off; you just need a flat surface.
4. Hollow out the strawberries carefully.
This is the trickiest step and requires patience.
Using a strawberry huller, small melon baller, or the tip of a paring knife, carefully remove the white core and some of the inner flesh.
Create a cone-shaped cavity that extends about 1/2 to 2/3 of the way into the berry.
Be very careful not to poke through the bottom or the sides; if you do, the filling will leak out.
Work gently since strawberries tear easily.
Set the hollowed strawberries cut-side up on a plate lined with paper towels to absorb any juice.
Save the strawberry cores for smoothies, snacking, or mixing into yogurt.
5. Make the cheesecake filling.
Place the softened cream cheese in a medium bowl.
Beat with a hand mixer on medium speed for about 2 minutes until completely smooth and slightly fluffy.
Scrape down the sides of the bowl.
Add the sifted powdered sugar and vanilla extract.
Beat on low speed until combined, then increase to medium and beat until smooth.
Add the sour cream (or Greek yogurt) and beat until fully incorporated and the filling is smooth, creamy, and pipeable.
Taste and adjust sweetness if desired; add more powdered sugar 1 tablespoon at a time.
If adding lemon zest and juice, or chocolate chips, fold them in now.
6. Chill the filling briefly (important for piping).
If the filling is very soft (this can happen if your cream cheese was warm or your kitchen is hot), refrigerate it for 10-15 minutes.
Filling that’s too soft won’t hold its shape when piped and will slump instead of forming pretty peaks.
The ideal consistency is thick enough to hold a stiff peak when you lift the beater.
7. Prepare your piping bag.
Fit a piping bag with a large open star tip (like Wilton 1M or 2D) for the prettiest results.
Alternatively, cut a 3/4-inch opening in the corner of a zip-top bag.
Fold the top of the bag down over your hand to create a cuff, then spoon the filling into the bag.
Unfold the cuff, push the filling down toward the tip, and twist the top of the bag closed.
8. Pipe the filling into the strawberries.
Hold a strawberry steady with one hand.
Insert the piping tip into the cavity and squeeze the bag gently to fill the hollow.
Once the cavity is full, continue piping while slowly pulling upward and decreasing pressure to create a decorative swirl or peak that rises above the strawberry.
Release pressure completely before pulling away to create a clean tip.
If you make a mistake, you can scrape the filling off and try again.
Work efficiently; the warmth of your hands will soften the filling over time, making it harder to pipe neatly.
If the filling becomes too soft, refrigerate it (and yourself) for a few minutes.
9. Add the graham cracker crumb topping.
Sprinkle graham cracker crumbs over the piped filling on each strawberry.
Do this immediately after piping, while the filling is still slightly tacky so the crumbs adhere.
Use your fingers to gently press the crumbs onto the filling if needed.
Important: Graham cracker crumbs absorb moisture and become soggy over time, so only add them to strawberries you plan to serve within the next 2-3 hours. For make-ahead, see storage notes below.
10. Refrigerate before serving.
Place the stuffed strawberries on a serving platter or arrange in mini cupcake liners for easier handling.
Refrigerate for at least 15-20 minutes before serving to firm up the filling and chill the strawberries.
This makes them easier to eat without the filling squishing out.
Helpful Tips and Substitutions
Why sour cream? Sour cream adds the characteristic tang of real cheesecake and helps create a lighter, more mousse-like texture. Greek yogurt works similarly but is slightly more tangy and less rich.
Filling too thick to pipe? Add sour cream 1 tablespoon at a time and beat until you reach the desired consistency.
Filling too thin to hold peaks? Refrigerate for 15-20 minutes, or add more powdered sugar (1-2 tablespoons at a time) which thickens and sweetens it.
No piping bag? Use a small spoon to fill each strawberry cavity, then use the back of the spoon to create a smooth dome. Less decorative but equally delicious.
Graham cracker crumb hack: Buy pre-made graham cracker crumbs in the baking aisle, or place whole graham crackers in a zip-top bag and crush with a rolling pin.
Flavor variations: For lemon cheesecake, add 1 tablespoon fresh lemon juice and the zest of 1 lemon. For chocolate chip, fold in 2 tablespoons mini chocolate chips. For pumpkin cheesecake, add 2 tablespoons pumpkin puree and 1/4 teaspoon pumpkin pie spice.
Dairy-free option: Use dairy-free cream cheese (like Kite Hill or Violife) and coconut cream. The flavor will be different but still delicious.
Serving Ideas
Arrange on a platter in a heart shape for Valentine’s Day, Mother’s Day, or bridal showers.
Place in individual mini cupcake liners on a tiered stand for easy grab-and-go serving.
Serve alongside other finger desserts like chocolate truffles, lemon bars, and mini tarts on a dessert buffet.
Drizzle melted chocolate or caramel sauce over the platter just before serving for an elegant touch.
Garnish the platter with fresh mint leaves and extra whole strawberries for color.
Make-Ahead and Storage
Filling (best make-ahead component): Prepare the cheesecake filling up to 3 days ahead. Store in an airtight container in the refrigerator. Before using, let it sit at room temperature for 10 minutes, then re-whip briefly to restore smooth, pipeable consistency.
Hollowed strawberries: Hollow the strawberries up to 4 hours ahead. Store them cut-side down on a paper towel-lined plate, covered loosely with plastic wrap, in the refrigerator. This prevents the cut surfaces from drying out while allowing any juice to drain.
Assembled strawberries (without graham cracker topping): Pipe the filling into the strawberries up to 6-8 hours ahead. Cover loosely with plastic wrap (don’t let it touch the filling) and refrigerate. Add graham cracker crumbs just before serving so they stay crisp.
Assembled strawberries (with graham cracker topping): Once you add the crumbs, serve within 2-3 hours. The crumbs will gradually absorb moisture and become soft.
Not recommended for freezing: Fresh strawberries become mushy and watery when frozen and thawed. Make these fresh.
Leftover filling: Use as a dip for fresh fruit, spread on graham crackers, or spoon over waffles or pancakes.
Simple, Stunning, and Absolutely Delicious
These stuffed strawberries are one of those recipes that looks far more complicated than it actually is.
The filling is forgiving, the assembly is straightforward, and the presentation is guaranteed to impress.
The only challenge is making enough, because people can’t stop at one.
For parties, double or triple the recipe and recruit a helper for the assembly line.
WANT TO SAVE THIS FOR LATER?
We'll email it to you!
We won't send you spam. Unsubscribe at any time.