Homemade Granola
Granola is one of those things that’s almost embarrassingly easy to make once you understand a few basic principles — and once you do, store-bought granola becomes hard to justify. Most commercial versions are either aggressively sweet, stale-tasting, or cost four dollars for a bag that lasts three days.
Homemade costs a fraction of that, keeps for a month, and you control exactly what goes in it. The base recipe below is straightforward. The techniques section after it is where most recipes fall short — because getting granola genuinely crunchy with real clusters takes a specific approach, and most people don’t explain why it works.
WANT TO SAVE THIS FOR LATER?
We'll email it to you!
We won't send you spam. Unsubscribe at any time.
Why You’ll Love This Recipe
- One bowl, one pan, about 40 minutes total
- Keeps for up to a month at room temperature — longer in the freezer
- Big crunchy clusters if you follow the pressing technique
- Naturally sweetened with maple syrup or honey
- Completely customizable — the base ratio works with almost any nut, seed, or spice combination
- Significantly cheaper than good store-bought granola
Ingredients
Makes about 6 cups (roughly 12 half-cup servings)
The Base
- 3 cups old-fashioned rolled oats — not quick oats, not steel-cut. Rolled oats toast evenly and form clusters. Quick oats burn fast and turn to mush
- 1/3 cup pure maple syrup or honey — maple syrup gives a slightly more complex flavor; honey is stickier and produces slightly crunchier granola with more defined clusters
- 2 to 3 tablespoons neutral oil — refined coconut oil, avocado oil, or a light olive oil. The ratio of sweetener to oil should run roughly 2:1 — more sweetener than oil. Too much oil and the granola comes out greasy and soft instead of crisp
- 1/2 teaspoon fine salt — don’t skip this, it’s what keeps granola from tasting like sweet cardboard. Flaky sea salt scattered over the top of the pan before baking is even better
- 1 teaspoon vanilla extract
- 1 teaspoon cinnamon
Mix-Ins (total about 1 to 1.5 cups — choose what you like)
- Raw nuts: almonds, pecans, walnuts, cashews, hazelnuts — roughly chopped or halved. Pecans and walnuts toast faster than almonds; if mixing them, add the faster-toasting ones halfway through baking
- Seeds: pepitas, sunflower seeds, sesame seeds, hemp seeds, chia seeds. Sesame adds a nutty depth that’s underrated in granola
- Unsweetened coconut flakes — added in the last 8–10 minutes of baking only, not at the start. Coconut burns fast
- 2 tablespoons nut butter — almond, peanut, or tahini mixed into the wet ingredients. This is the single biggest thing you can add for more clusters and more staying power
Add After Baking
- 1/2 cup dried fruit — cranberries, raisins, cherries, chopped apricots, blueberries. Never bake dried fruit with the granola — it burns or turns into hard little pebbles
- Chocolate chips — stir in once the granola has cooled completely, not while it’s still warm or they’ll melt into a mess
How to Make It
Prep: 10 minutes | Bake: 30–35 minutes | Cool: 45 minutes minimum | Total: about 1 hour 20 minutes
Step 1 — Preheat to 325°F and line your pan.
Line a large rimmed half sheet pan with parchment paper. The parchment prevents the sweetener from welding itself to the pan and tearing the granola when you try to move it, and cleanup takes about 10 seconds.
325°F works well for this recipe. It’s worth knowing there’s another approach — some recipes bake at 250°F for a longer time, around 50–60 minutes, specifically to get larger clusters without any risk of burning. That method works too and is more forgiving if your oven runs hot. The 325°F version is faster and produces a slightly deeper toasted flavor.
Step 2 — Mix the wet ingredients separately.
Whisk the maple syrup, oil, vanilla, salt, and cinnamon together in a small bowl. If you’re adding nut butter, whisk it in here — it won’t fully incorporate but that’s fine, it distributes when you mix everything together. If the nut butter is stiff, warm the whole mixture in the microwave for 20 seconds first. It makes coating the oats evenly much easier.
Step 3 — Combine with the oats and nuts.
Add the oats and any nuts or seeds (except coconut) to a large bowl. Pour the wet mixture over and stir for a full minute until every oat is coated and there are no dry pockets at the bottom of the bowl. The mixture should look uniformly glossy. Under-coated oats stay pale and won’t bond together — this step is worth taking seriously.
Step 4 — Spread and press firmly onto the pan.
Pour the mixture onto the prepared sheet pan. Spread into an even layer, then use the back of a spatula or your hands to press it down firmly into a compact, flat layer about 3/4 to 1 inch thick. The more compressed it is going in, the bigger the clusters coming out.
If the layer looks thin enough that you can see parchment through it in spots, split it across two pans rather than spreading it thinner. Thin granola produces loose crumbles. Thick, compressed granola produces chunks.
Step 5 — Bake, then press again at the halfway point.
Bake for 15 minutes completely undisturbed. Don’t open the oven, don’t stir, don’t check on it.
At 15 minutes, pull the pan out. The granola will look pale and unfinished — that’s correct, it’s not done. Rotate the pan 180 degrees for even baking, then use a spatula to flip sections of the granola in chunks rather than stirring it. You’re turning it over, not breaking it up. Press firmly down again to compact it back into a flat layer.
Scatter coconut flakes over the top now if you’re using them and press them lightly into the surface.
Return to the oven for another 12–18 minutes.
Step 6 — Pull it out before it looks done.
This is where most people go wrong. Granola looks underdone when it’s actually perfectly cooked — it will still be slightly soft coming out of the oven and the color will be a light golden brown. It firms up and crisps as it cools, and it will continue doing so for 20–30 minutes after leaving the oven.
The right signal is smell rather than color. When the kitchen smells like toasted oats and warm caramel, it’s ready. If it smells like it’s starting to catch, pull it immediately — the bottom layer burns before the top shows any sign of it. If the edges look darker than the center, that’s normal; pull it when the center looks golden, not when the edges do.
Step 7 — Cool completely. Don’t touch it.
Set the pan on a wire rack and leave it alone for at least 45 minutes. The sugars are still hardening and bonding during this time. Breaking it up or moving it while warm destroys clusters before they’ve set — and once they’re broken, they don’t re-form.
Once fully cool, break it into pieces with your hands. Add dried fruit and any chocolate chips now and stir gently.
What Actually Makes Granola Clumpy
Clusters form when the sweetener melts during baking and then hardens around groups of oats as the granola cools. Getting them consistently comes down to a few specific things that most recipes mention but don’t properly explain.
The sweetener-to-oil ratio matters more than most recipes admit. Too much oil relative to sweetener and the oats stay coated in fat rather than bonding — you get granola that’s rich and crispy in individual pieces but never clusters. Aim for roughly twice as much sweetener as oil by volume. Adding nut butter to the wet mix on top of this gives you extra binder and means the clusters hold together even after the granola breaks apart on the pan.
Pressing is the other half of it. Granola needs to be physically touching itself to bond — loose, spread-out oats just toast individually. Press firmly before it goes in, press again at the flip, and then don’t touch it until it’s completely cold. The cooling period is when the sugar sets. Move it early and you’ll have perfectly good granola with no clusters. Leave it alone and you’ll have chunks.
Stirring is the enemy of clusters. The standard advice to stir granola frequently while baking is wrong if you want clumps. Stir once, at the halfway point, using the flip-and-press method rather than mixing. That’s it.
Tips and Variations
Egg white for bigger clusters: Whisk one egg white until frothy and stir it into the oat mixture along with the wet ingredients. The protein sets during baking and acts as an additional binder, producing noticeably larger and sturdier clusters than the basic recipe. Worth trying once you’ve made the base version a few times and want more structure.
Oil choice affects more than you’d think. Refined coconut oil is neutral and crisps well. Unrefined coconut oil adds a distinct coconut flavor — good if you want that, not neutral otherwise. Olive oil gives a fruity, slightly savory note that sounds strange but works well with rosemary or dark chocolate variations. Butter gives the richest flavor of all and produces excellent clusters, but the granola won’t keep as long — about 2 weeks instead of a month, because butter goes rancid faster than oil.
Salt is non-negotiable. Flat, one-dimensional granola almost always needs more salt, not more sweetener. If you’re using fine salt mixed into the wet ingredients, also add a pinch of flaky sea salt scattered over the top of the pan right before it goes in. The uneven saltiness you get from flaky salt is noticeably better than fine salt alone.
Spice beyond cinnamon. Cardamom is excellent at half the quantity you’d use for cinnamon — it’s stronger and can take over quickly. Ginger and nutmeg alongside cinnamon give a warmer, more layered flavor. A teaspoon of espresso powder in the wet mix sounds odd and is very good, particularly in any combination involving chocolate or nuts.
On Medjool dates: Unlike other dried fruit, chopped Medjool dates can go in during the last 5 minutes of baking and come out slightly caramelized. Chop them into small pieces first and watch carefully — they have more moisture than most dried fruit and can go from perfect to burnt quickly. Add them after baking if you’d rather not risk it.
Savory granola is worth trying. Skip the sweetener and vanilla entirely. Use olive oil, add fresh rosemary, black pepper, grated parmesan, and a mix of nuts and seeds. Bake the same way. Serve over salad or a bowl of soup instead of bread. It’s not what most people expect granola to be and it’s genuinely good enough to make people ask what it is.
Serving Ideas
With milk like cereal, over yogurt with fruit, crumbled over a smoothie bowl. All fine and obvious.
Less obvious: pressed into the top of a banana bread batter before it goes in the oven — it bakes into a crunchy crust that makes a standard banana bread worth talking about. Crumbled over vanilla ice cream. Eaten by the handful at 10pm, which is where most homemade granola actually ends up regardless of what you planned for it.
Storage
Room temperature in an airtight container for up to one month. A wide-mouth mason jar is ideal — seals well, you can see what’s left, and it looks good sitting out on the counter, which matters when you’re opening it every day.
Make sure the granola is completely cool before sealing. Steam trapped from warm granola will make everything soft by the next morning — the one thing you cannot fix with more baking time at that point.
If granola goes soft in storage, spread it on a sheet pan and bake at 300°F for 8–10 minutes. It will crisp back up as it cools. It won’t be quite as good as fresh but it’s close.
Granola freezes well for up to 3 months in a sealed freezer bag. The texture holds up better than you’d expect — it comes out tasting almost identical to fresh. Worth doing if you want to make large batches when you have time.
Flavor Combinations Worth Making
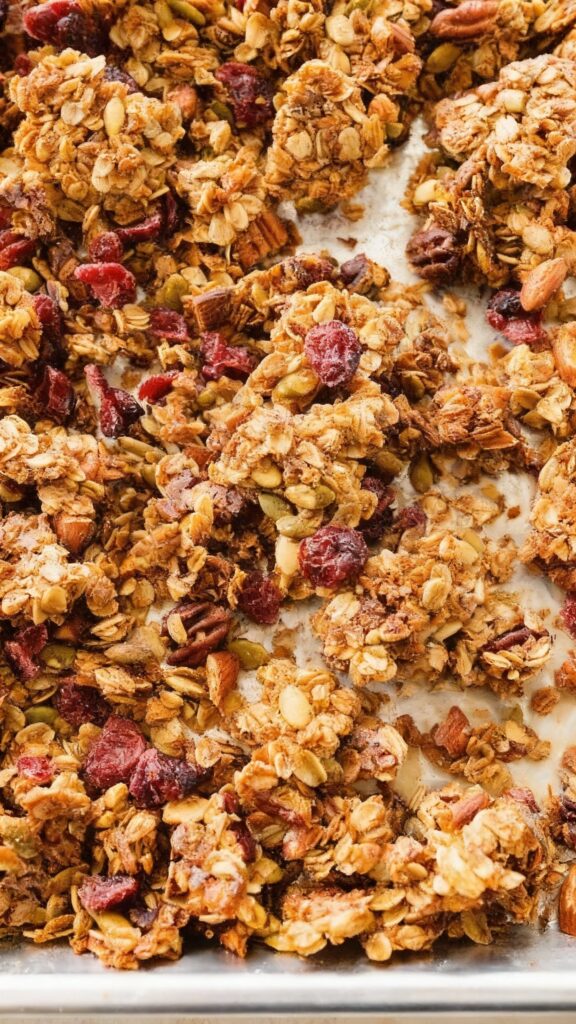
Classic: Rolled oats, pecans, pepitas, maple syrup, coconut oil, cinnamon, vanilla, dried cranberries after baking. This is the version most people make first and keep making because there’s nothing to improve.
Maple pecan: Double the pecans, extra maple syrup, a tablespoon of brown sugar dissolved into the wet mix, flaky salt scattered over the top before baking. The brown sugar caramelizes differently than maple syrup and gives the clusters a slightly brittle, toffee quality.
Dark chocolate and almond: Sliced almonds, two tablespoons of almond butter in the wet mix, a tablespoon of cocoa powder whisked into the wet mix, maple syrup, no cinnamon. Dark chocolate chips stirred in after cooling. The cocoa in the wet mix gives the oats a deep color and a bittersweet flavor that makes the chocolate chips taste more like a deliberate addition than an afterthought.
Tropical: Macadamia nuts, coconut flakes added in the last 8 minutes, honey, coconut oil, a pinch of ginger, dried mango and pineapple after baking. Best in summer. The honey and coconut oil combination gives the clusters a glassier, more brittle crunch than maple syrup does.
Peanut butter and honey: Peanuts, sunflower seeds, two tablespoons of peanut butter in the wet mix, honey, a pinch of cayenne. Chocolate chips after cooling if you want them. The peanut butter and honey combination needs nothing else — don’t add cinnamon or vanilla, they compete.
The first batch will probably be slightly imperfect — maybe not as clumpy as you wanted, or pulled a minute too late. Make it again with those adjustments and it’ll be exactly right. After that it becomes one of those recipes you make without thinking about it.
WANT TO SAVE THIS FOR LATER?
We'll email it to you!
We won't send you spam. Unsubscribe at any time.