7 Halloween Cake Pops That Are Actually Doable at Home
Cake pops are already fun, but Halloween takes them to a whole new level. With some candy melts, edible decorations, and a little creativity, you can turn simple cake pops into spooky party treats everyone will remember. These seven ideas are not just Pinterest eye-candy — they’re realistic to make at home, even if you’re not a pro baker.
Here’s how I do it: bake a simple cake, crumble it, mix with frosting, roll into balls (or ovals), dip in candy melts, and decorate. That’s it. Below you’ll find seven different ways to dress them up for Halloween — with all the ingredients and steps spelled out.
👉 Pro tip: life is a lot easier with the right tools. I swear by cake pop sticks, candy melts, edible candy eyes, food-safe markers, piping bags, and a cake pop stand so nothing tips over while drying.
WANT TO SAVE THIS FOR LATER?
We'll email it to you!
We won't send you spam. Unsubscribe at any time.
Base Cake Pop Dough
Bake any cake you like (vanilla, chocolate, or red velvet). Crumble it into fine crumbs in a big bowl. Add about 6–8 tablespoons of frosting and mix with your hands until it holds together like Play-Doh. Roll into 20–22 g balls, chill for 30 minutes, and you’ve got the base for every recipe below.
Melt a few tablespoons of candy melts, dip one end of each cake pop stick, then insert it into a cake ball. Chill another 10 minutes so the stick stays put.
How to Melt and Dip Cake Pops (Foolproof Method)
This step trips up a lot of beginners, so here’s exactly how I do it:
- Choose the right melts. Candy melts or coating chocolate are best. Chocolate chips don’t melt as smoothly.
- Microwave in short bursts. Put about 12 oz (340 g) of candy melts in a deep mug or bowl. Microwave 30 seconds at 50% power, stir, then repeat in 15–20 second bursts until smooth. Don’t overheat — it should be silky, not thick or grainy.
- Thin if needed. If the coating feels heavy, stir in 1–2 tsp of neutral oil or paramount crystals. You want it pourable but not runny.
- Dip the right way. Take a chilled cake pop and dip it straight down into the melts. Pull it straight up, then hold it sideways and gently tap your wrist to let excess drip off. Don’t stir or twist — that loosens the stick.
- Set upright. Stick the pop into a styrofoam block or cake pop stand until the coating hardens (about 10–15 minutes).
Once you’ve mastered this, every design below becomes super easy.
Witch Cauldron Cake Pops

Ingredients
- 12 oz (340 g) black candy melts
- 4 oz (120 g) green candy melts or green buttercream
- Mini gummy worms, Halloween sprinkles, candy eyeballs, candy bones
- Mini pretzel sticks
Steps
- Dip pops in black candy melts and let set.
- Pipe or spoon green melts/buttercream on top so it looks like potion bubbling over.
- Press in gummy worms, eyeballs, and sprinkles before it hardens.
- Stick in half a pretzel as a witch’s spoon.
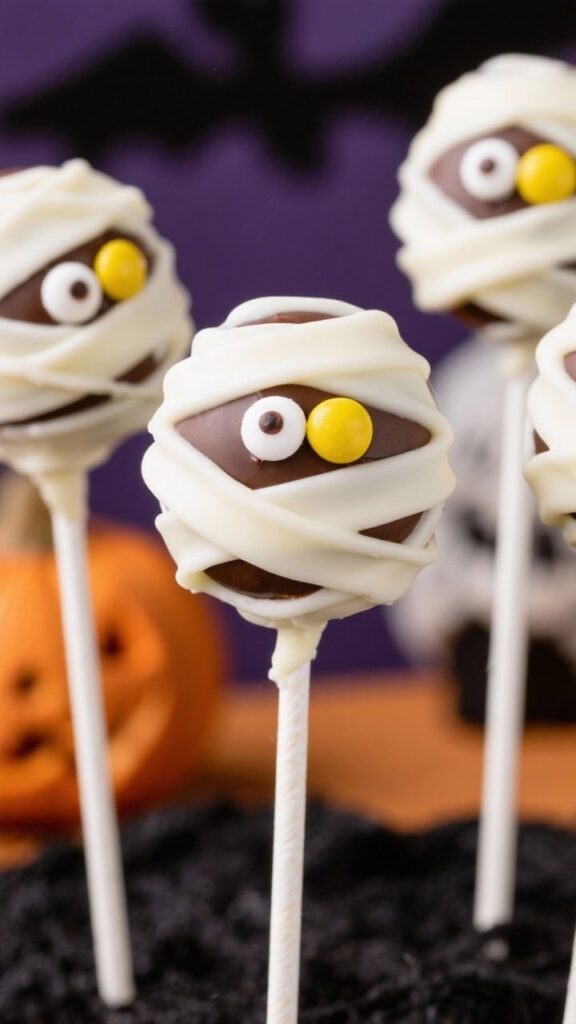
Mummy Cake Pops
Ingredients
- 16 oz (450 g) white candy melts
- Edible candy eyes
Steps
- Dip pops in white candy melts and let set.
- Put more melted coating in a piping bag, snip a small hole, and drizzle back and forth for bandages.
- Add two eyes while the drizzle is still soft so they peek out.
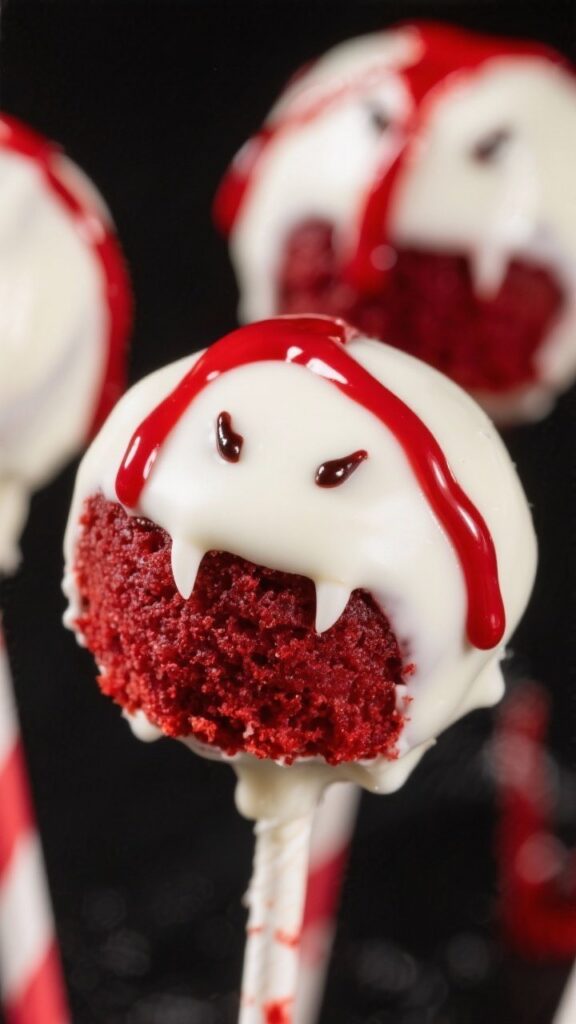
Vampire Bite Cake Pops
Ingredients
- Red velvet cake base (red velvet cake mixed with cream cheese frosting)
- 12 oz (340 g) white candy melts
- Red piping gel
Steps
- Dip in white candy melts and let dry until smooth.
- Use a toothpick to poke two holes in the surface.
- Dot red piping gel into the holes and let it drip down like blood.
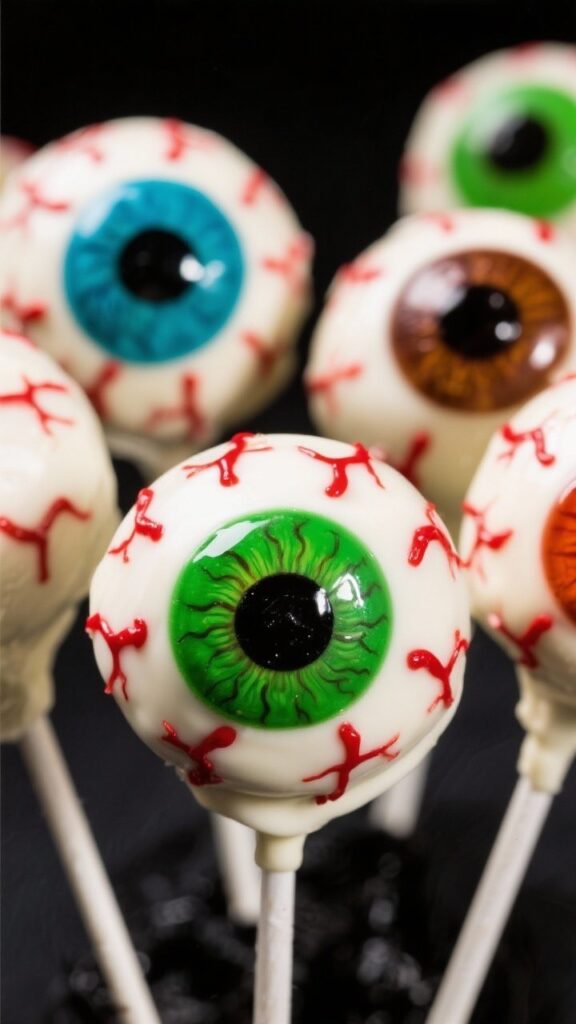
Eyeball Cake Pops
Ingredients
- 12 oz (340 g) white candy melts
- Colored candy melts (blue, green, brown) or fondant discs for irises
- 2 oz (60 g) dark chocolate melts for pupils
- Edible red marker or red paint for veins
Steps
- Dip in white candy melts and let harden.
- Pipe or press on an iris in the center, then dot with melted chocolate for the pupil.
- Draw fine red veins radiating outward with a marker or paintbrush.
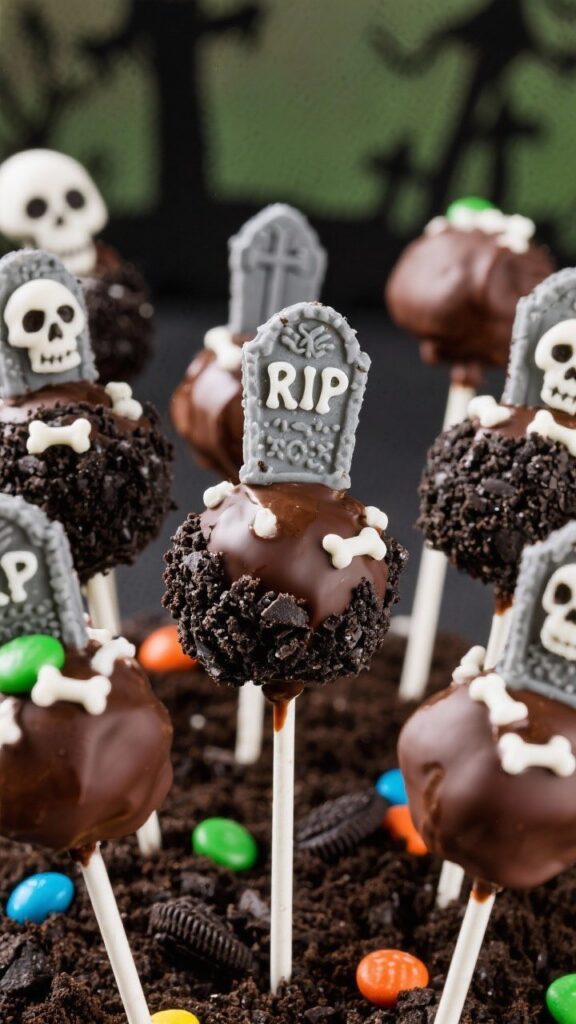
Graveyard Cake Pops
Ingredients
- 12 oz (340 g) milk or dark candy melts
- Crushed chocolate sandwich cookies (Oreos work best)
- Rectangle cookies (Milano, graham crackers) for tombstones
- 2 oz (60 g) white candy melts for piping “RIP”
Steps
- Dip in chocolate coating and immediately sprinkle the top with cookie crumbs.
- Attach a cookie “tombstone” with a dab of chocolate.
- Pipe “RIP” on each tombstone with white melted coating.
Black Cat Cake Pops

Ingredients
- 12 oz (340 g) black candy melts
- Almond slivers or candy corn for ears
- Edible candy eyes
- Pink and white melts for details
Steps
- Dip in black coating and let set.
- Attach almond slivers or candy corn as ears with melted coating.
- Add eyes, pipe a tiny pink nose, and draw whiskers with white coating.
Zombie Brain Cake Pops

Ingredients
- 12 oz (340 g) pink candy melts
- 4 oz (120 g) darker pink or red melts for piping
- Red piping gel (optional)
Steps
- Shape dough into ovals and chill.
- Dip in pink coating and let dry completely.
- Pipe squiggly brain folds with darker pink coating.
- Add drips of red gel between the folds for a gory look.
🎃 Final tip: Don’t stress about perfection. Halloween cake pops look even better with messy drips, cracks, and uneven details. That’s what makes them spooky.
WANT TO SAVE THIS FOR LATER?
We'll email it to you!
We won't send you spam. Unsubscribe at any time.